Trying to submit photos to airliners.net
After visiting the ANA and JAL maintenance hangars last week, seeing that the weather was clear with high Visibility, I went to the Haneda International Terminal with a few colleagues to take photos of aircraft for a few hours.
One of the highlights that day was capturing a rare airframe, HL7227, a Boeing 737 Business Jet (BBJ), belonging to Hanwha Chemical Corp. Since the lighting was good, I felt the photo results were decent, so I decided to submit it to airliners.net. The screening took over a week, and this time I was lucky enough to pass, so my first photo was published.
Summary of airliners.net Rejection Reasons
Aviation Photo #4344151: Boeing 737-7HF BBJ - Hanwha Chemical Corp
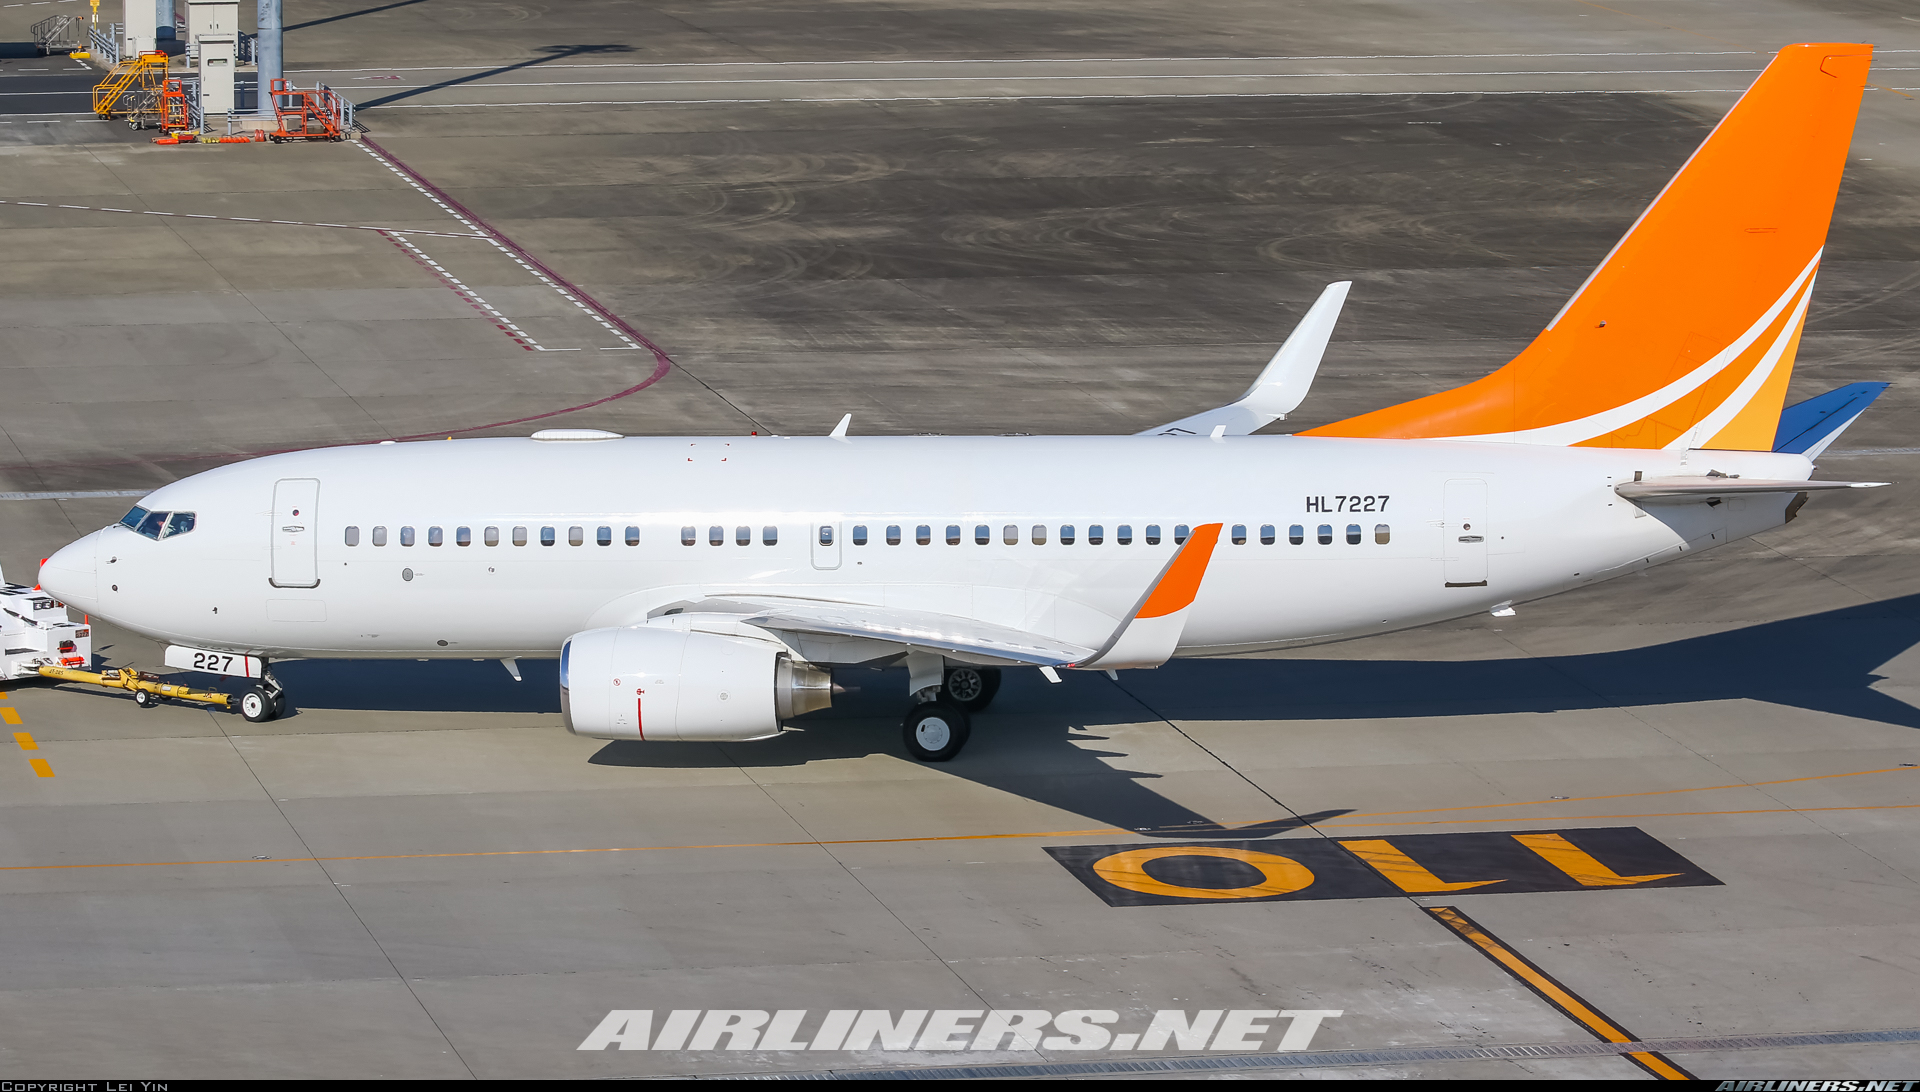 Personally, I feel the dynamic range of the highlights in this photo is quite wide.
Although the fuselage is a bit bright, the details are preserved, which is actually quite difficult to achieve.
Personally, I feel the dynamic range of the highlights in this photo is quite wide.
Although the fuselage is a bit bright, the details are preserved, which is actually quite difficult to achieve.
As a beginner in aviation photography, I have tried submitting 5-6 photos to airliners.net before, but they were all rejected during the screening phase, for various reasons. A summary of the rejections I’ve seen includes:
- Blurry
- Halos
- Quality
- Colour
- High in Frame
- Personal Message
- Motive
- Oversharpened
- Distance
- Compression
- Noise
- Dark
- Soft
- CW Rotation and so on. After all, this site is known for its strict screening; it requires photos to be very sharp, and requires the standard spotter-style composition, such as clearly showing the airline livery, registration code, engine shape, etc. The Photo Acceptance Guide and Photo Editing Guide are too long and need to be studied slowly.
I guess HL7227 is quite rare, and there haven’t been any submissions of this aircraft in the past year, so my photo passing was quite lucky.
The shooting parameters for this photo are as follows: Camera Canon EOS 7D Mark II Lens Canon EF 100-400mm f/4.5-5.6L IS II USM Shutter 1/800 sec; Aperture f/9; ISO 160 Focal Length 100mm; Exposure Mode Shutter Priority; Metering Mode Matrix Metering Exposure Compensation 0; White Balance Auto; Format JPEG
Below is a brief summary of the retouching steps in Lightroom for my future reference. 1 Use Lightroom for fine-tuning “HHighlights” and “Whites” - Slightly decrease “Shadows” and “Blacks” - Slightly increase “Dark Tones” - Slightly decrease “Contrast” - Slightly increase First stage noise reduction, “Luminance” and “Detail” in “Noise Reduction” - Slightly increase
2 Use Dfine2 auto preset for second stage noise reduction
3 Use Lightroom for sharpening “Contrast” - Slightly increase “Clarity” - Slightly increase “Shadows” - Slightly increase “Amount”, “Radius”, and “Detail” in “Sharpening” - Slightly increase “Remove Chromatic Aberration” “Amount”, “Size”, and “Roughness” in “Grain” - Slightly increase
4 Use Lightroom to export, “Format” as JPEG, “Quality” as 100, “Color Space” as sRGB, “Long Edge” as 1920 or 1500 pixels, “Sharpen For” as Screen, “Sharpening Amount” as Low. It is best to change settings and export a few photos, compare the effects, and choose the most satisfactory one.
End
Update May 8 A pilot friend told me about this webpage, [Original] Methods to improve acceptance rate on A.net written by an airliners.net screener. If you are interested in this topic, you can refer to the URL above. Also, this site has previously introduced notes from professional photographer Hideki Motoi’s aviation photography lecture, and Canon 7D Mark II Custom Functions and Shooting Tips, welcome to visit.
Update May 14 Since I now know the rejection reasons, let’s briefly summarize the conditions for easily accepted photos.
- The closer to the aircraft the better, with distinct fuselage details
- Focus must be extremely accurate, no out-of-focus or camera shake. Even the slight vibration of a DSLR mirror can affect focus, even on the top-tier Canon 1DX2.
- The higher the air transparency/clarity, the better
- The aircraft must be Level
- Key identification parts such as engines and registration must be clearly visible
- High sharpness
- Blue sky and clear air (no pollution/haze)
- Even if shooting at night, the aircraft must be bright
- Colors should not be too saturated
- If the distance to the aircraft is far, the photo size should not be too large; 1920px length is difficult, 1280px smaller sizes are easier to accept
July 10 Another photo taken on the same day was also selected, I’ll post it here as well. <img src=https://imgproc.airliners.net/photos/airliners/1/8/4/4432481.jpg?v=v4d1c5a3e492>
July 25 Saw this explanation of screening reasons,
Priority add after -1 HQ = Photo has been direct added by the first screener. Priority add after 0 HQ = Photo has been SO'd by the first screener(s) and got direct added by a second (or third, fourth, etc.) screener. High Quality (HQ or HQ1) = First screener likes it, but sees a relatively minor flaw. Then he HQ's it so another screener can have a look. It takes 2 HQ's to add a photo. Second Opinion (SO) = The first screener sees something major, but doesn't want to reject it for whatever reason.
Priority add after -1 HQ: Very high quality, passed on the first screening Priority add after 0 HQ: High quality, passed after more than two screenings High Quality (HQ or HQ1): High quality, but has some minor flaws Second Opinion (SO): Relatively high quality, screener prefers not to reject it