A First Look at the G1000 Navigator in X-Plane 11
After writing Upgrading to X-Plane 11.10b8 to Try Out the G1000, I became interested in how to use the G1000. I went to the official Garmin website and downloaded the Garmin G1000 Pilot’s Guide for Cessna Nav III manual. I’ve only looked at the beginning of this 600+ page document, but I found that its operation is still very similar to the G530. The usage methods introduced in the X-Plane 11 G530 Navigation Tutorial are all applicable. It seems that when designing the UI, the product had mature considerations regarding operational compatibility.
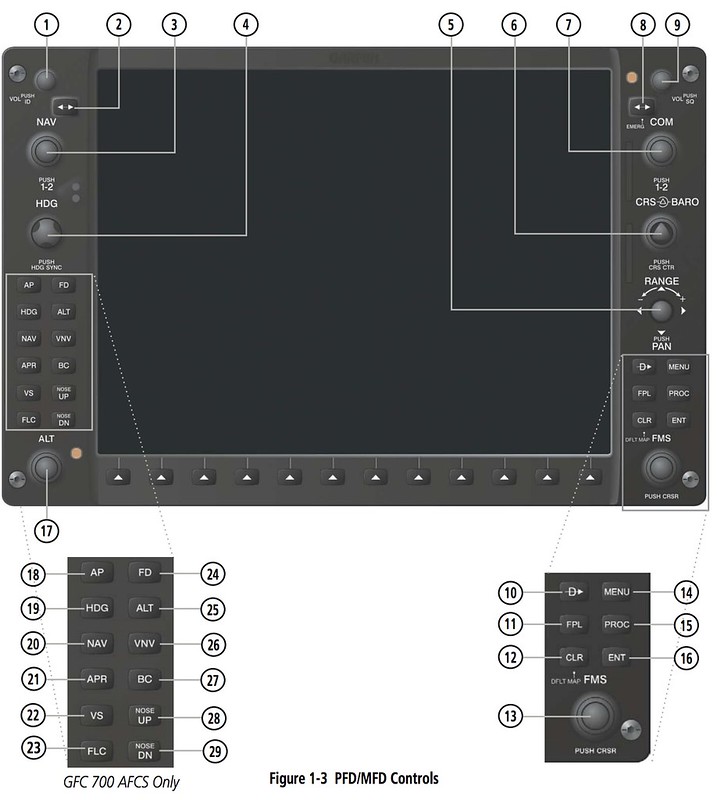
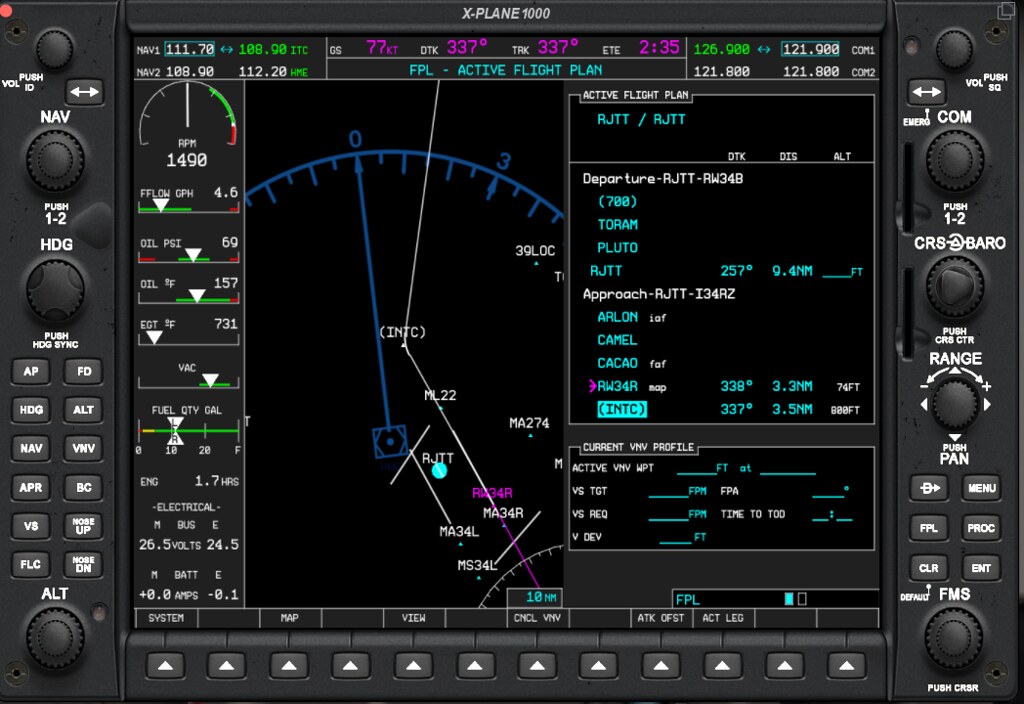
For example, when setting a flight plan, the control buttons are in the bottom right corner.
 Long press the CLR button (12) to enter map mode, then press the FPL button (11) to open the flight plan entry window.
Then use the large knob (13) to move the cursor to the row you want to add.
Press the button in the center of 13 to highlight it, and use the knob to set the Waypoint.
After confirming the Waypoint, press ENT (16) to confirm the entered data.
Press the MENU button (14) to activate the function menu for save or delete operations.
Additionally, 10 is for Direct To, and 15 (PROC) is for Approach, Arrival, or Departure standard procedures.
Long press the CLR button (12) to enter map mode, then press the FPL button (11) to open the flight plan entry window.
Then use the large knob (13) to move the cursor to the row you want to add.
Press the button in the center of 13 to highlight it, and use the knob to set the Waypoint.
After confirming the Waypoint, press ENT (16) to confirm the entered data.
Press the MENU button (14) to activate the function menu for save or delete operations.
Additionally, 10 is for Direct To, and 15 (PROC) is for Approach, Arrival, or Departure standard procedures.
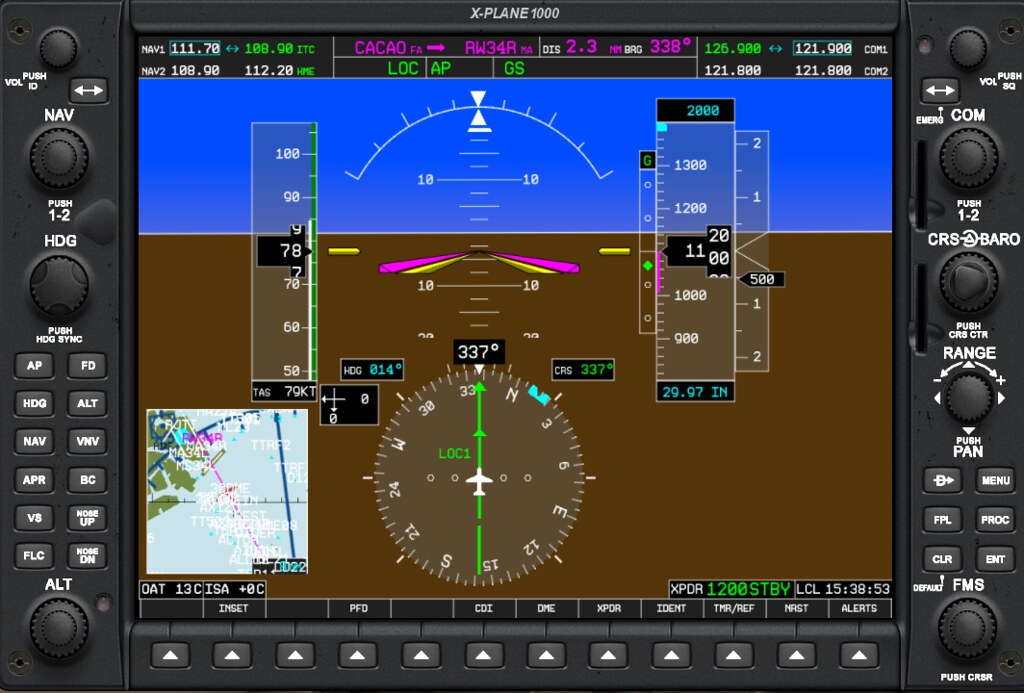
Regarding the autopilot, the control buttons are in the bottom left corner.
 18 and 24 are for activating the Autopilot (AP) and Flight Director (FD).
19 is for activating Heading navigation. The specified Heading is set using the HDG knob (4).
25 is for activating Altitude (ALT) hold. Altitude can be set using the ALT knob (17).
20 is for activating horizontal navigation (NAV), and 26 is for activating vertical navigation (VNV).
21 is for activating Approach (APR) navigation, and 27 is for activating Back Course (BC).
22 is for setting Vertical Speed (VS), and 23 is for setting Flight Level Change (FLC).
28 and 29 are for Nose Up and Nose Down settings.
Knob 6 is for setting the COURSE, and 5 is the map range zoom knob.
18 and 24 are for activating the Autopilot (AP) and Flight Director (FD).
19 is for activating Heading navigation. The specified Heading is set using the HDG knob (4).
25 is for activating Altitude (ALT) hold. Altitude can be set using the ALT knob (17).
20 is for activating horizontal navigation (NAV), and 26 is for activating vertical navigation (VNV).
21 is for activating Approach (APR) navigation, and 27 is for activating Back Course (BC).
22 is for setting Vertical Speed (VS), and 23 is for setting Flight Level Change (FLC).
28 and 29 are for Nose Up and Nose Down settings.
Knob 6 is for setting the COURSE, and 5 is the map range zoom knob.
Overall, the basic operation doesn’t seem too difficult. After practicing for a while, you can get the hang of it.
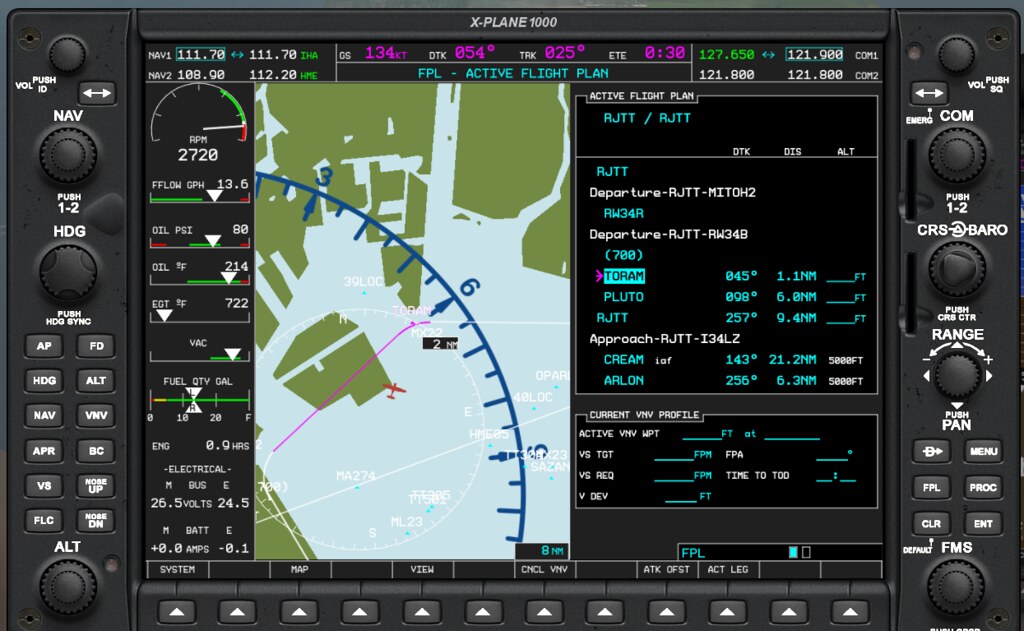
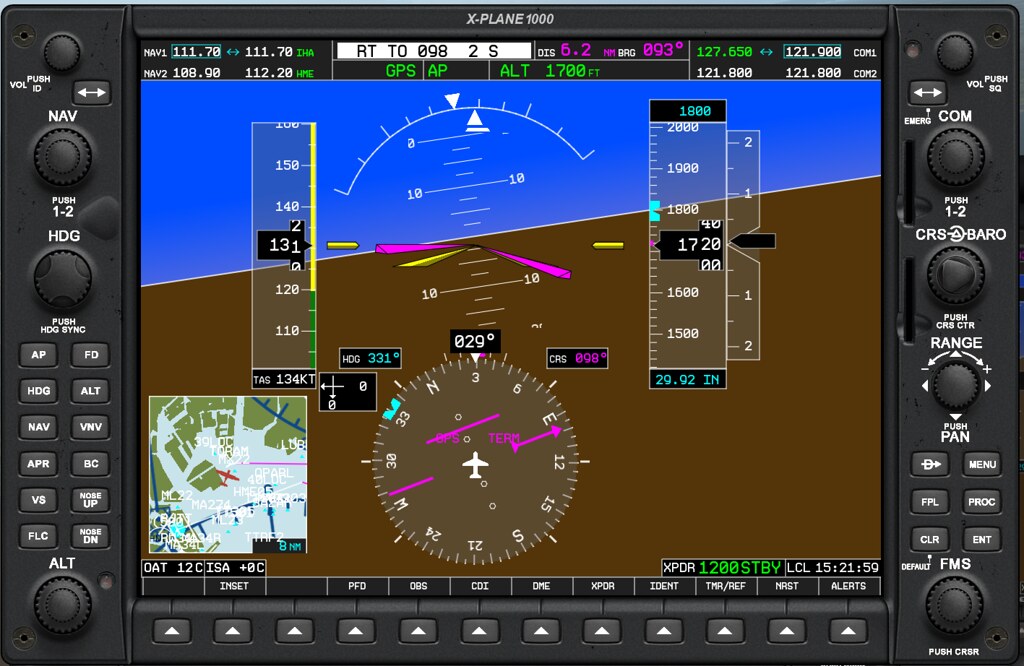
I tested it again at Haneda Airport, with the final approach being the 34R ILS.
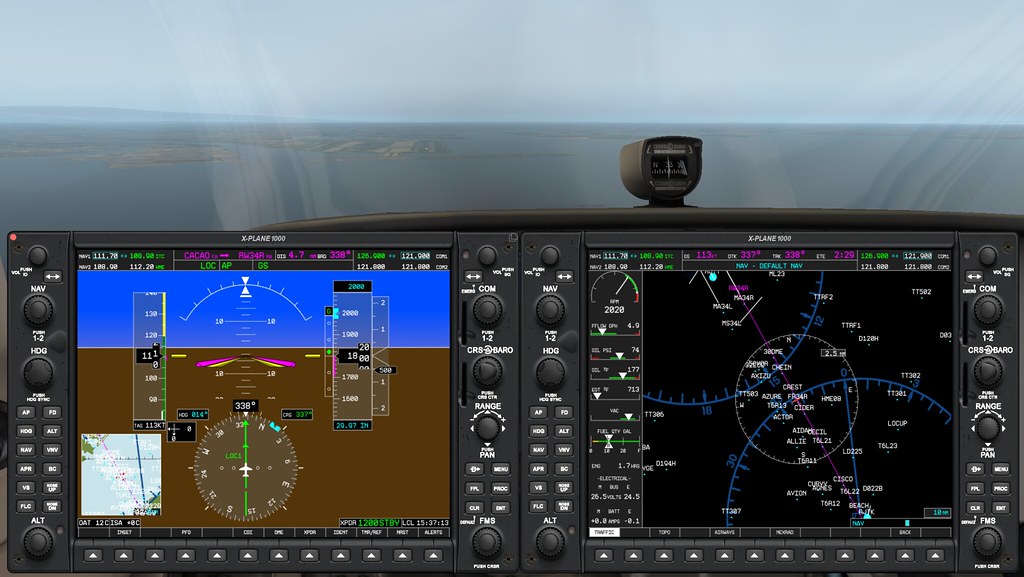 Let’s zoom in on the MFD and PFD to see the details.
I’ve been flying the C172 manually with analog instruments for years, Suddenly moving to a digital glass cockpit with full autopilot, where flight control is just a matter of pressing a few buttons, is really something I’m not quite used to yet.