Flight Simulation Hardware
-
First Look at the New miniCOCKPIT Product: miniOVHD
miniCOCKPIT’s latest product, the miniOVHD, was released this month, so I ordered one immediately. It finally arrived today, so let’s unbox it, set it up, and test it out.
The miniOVHD box

The compact miniOVHD

The official website provides detailed setup instructions. The specific steps are: 1 Connect the miniOVHD to the miniCFU
 2 Firmware update. On Mac, execute miniCOCKPIT Firmware 20251113 Uploader.app
 3 Install the X-Plane plugin. Extract miniCOCKPIT MAC DLS.zip into the resources/plugins directory


-
miniEFIS Unboxing and Setup
The miniEFIS arrived two months ago, but I’ve been too busy with work to find time to install it.
 Finally, in February, I was able to unbox it.
Following the official website’s miniEFIS setup article, I connected the miniEFIS to the miniFCU. <img src=https://cdn.shopify.com/s/files/1/0834/0547/2063/files/faq-efis-setup-1.jpg?v=1728917854>
<img src=https://cdn.shopify.com/s/files/1/0834/0547/2063/files/faq-efis-setup-2.jpg?v=1730173404>
<img src=https://cdn.shopify.com/s/files/1/0834/0547/2063/files/faq-efis-setup-3.jpg?v=1730183821>
<img src=https://cdn.shopify.com/s/files/1/0834/0547/2063/files/faq-efis-setup-7.jpg?v=1725720622>
Next, I downloaded the latest firmware
miniCOCKPIT-Firmware-Uploader-MAC-1.0.2-20241117.zipand ran it. I could see various lights flashing.
 After a while, I could see the display indicating the firmware upload was successful.

-
Playing Flight Simulation on a Large Screen
Recently, Xiaomi in Japan has been running a sale, so I picked up a 42-inch monitor for 29,800 yen to put in the bedroom. Usually, I just use it to watch YouTube or Amazon Prime videos, but then I wondered if flight simulation would look better on a big screen, so I connected it via HDMI to give it a try.
In the X-Plane 12 graphics settings, I set Monitor 1 (the Xiaomi display) to full-screen simulator mode, and designated the main display (the MacBook Pro screen) as the Instructor Operating Station.
 I plugged in the Yawman Arrow Handheld Controller,
started up the Cessna 172, and took to the skies immediately.
I plugged in the Yawman Arrow Handheld Controller,
started up the Cessna 172, and took to the skies immediately. -
Yawman Arrow Handheld Controller
I recently purchased a new flight simulation peripheral – the Yawman Arrow Handheld Controller. The experience feels pretty good, so here is a brief introduction.


First, I used ChatGPT-4o to translate the instructions from the Yawman Arrow Handheld Controller product website:
Full-Function Handheld Cockpit The Yawman Arrow is a fusion of traditional handheld game controllers and the unique flight control systems found in various aircraft. To achieve precision and versatility, the Arrow integrates flight controls such as traditional joysticks, desktop throttle controls, and rudder pedals into a single handheld device.
-
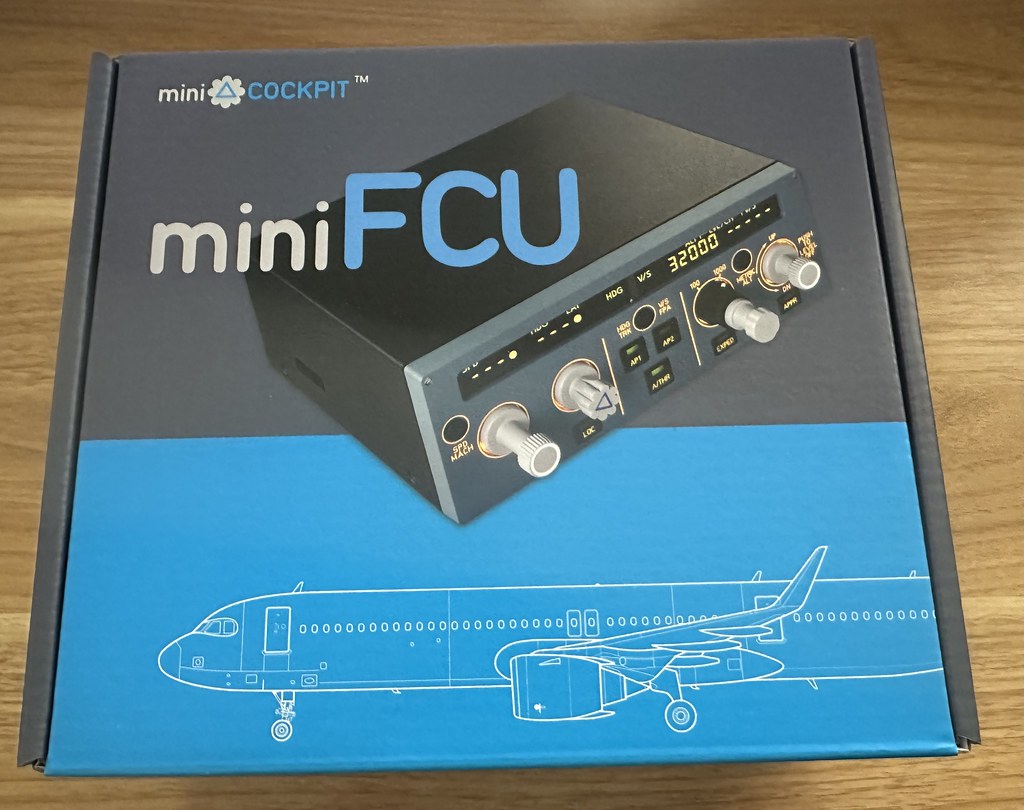
miniCOCKPIT miniFCU Peripherals
The miniFCU (Flight Control Unit) I ordered from miniCOCKPIT a few months ago has finally arrived. I immediately installed it on X-Plane 12 to give it a try.

First, I registered the device on the official website to activate the one-year warranty service.
First, install the Plugin. According to the instructions here, download
DLS miniCOCKPIT_mac_1.0.0.zipfor X-Plane 12, and then copy the Plugin into X-Plane’s plugins folder. Due to the issue where the Mac.xpl Plugin doesn’t start on MacOS, I also needed to allow Mac.xpl in the system’s security settings. -
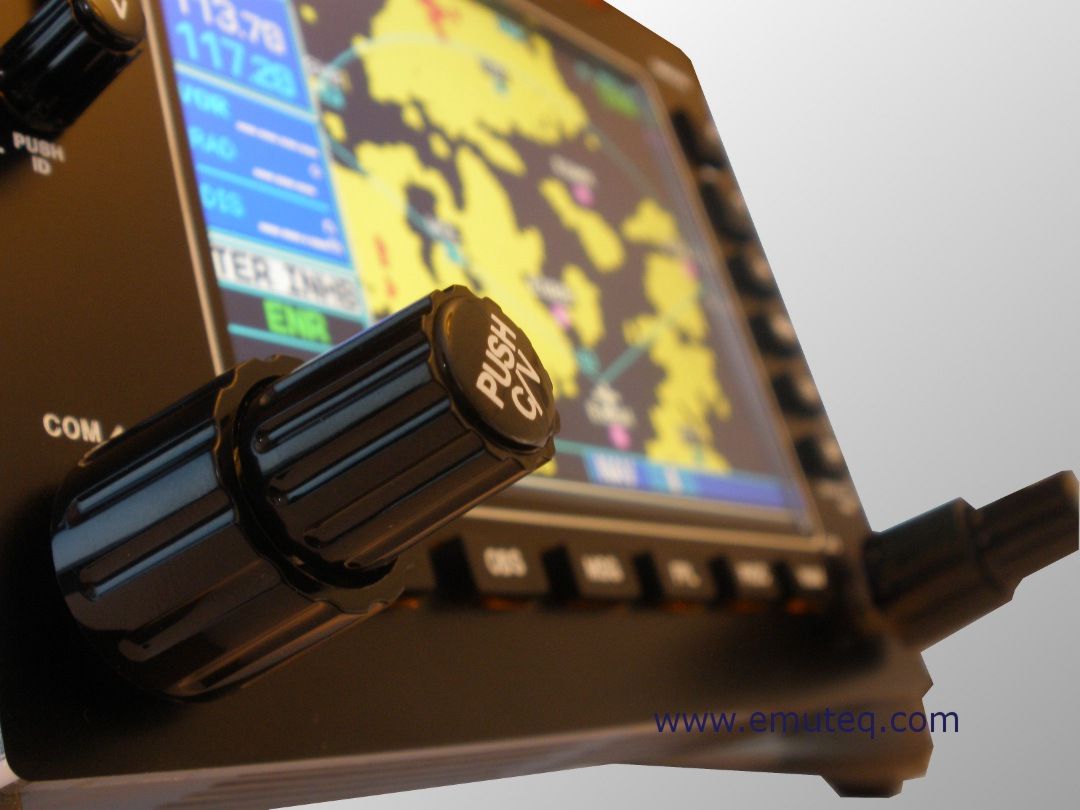
G530 Navigator Flight Simulation Hardware
After finishing the X-Plane 11 G530 Navigation Unit Tutorial, I discovered a piece of G530 hardware. This is truly a great piece of gear, so let me introduce it first.
GarSIM GNS530 from emuteq.com

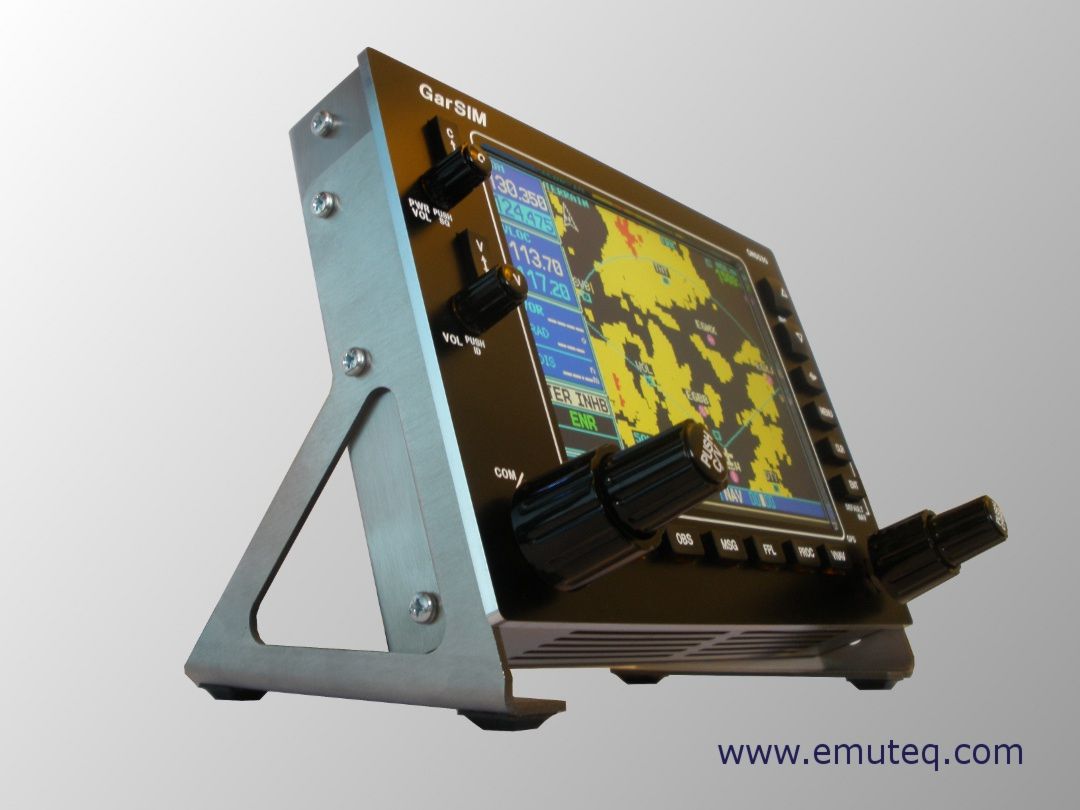
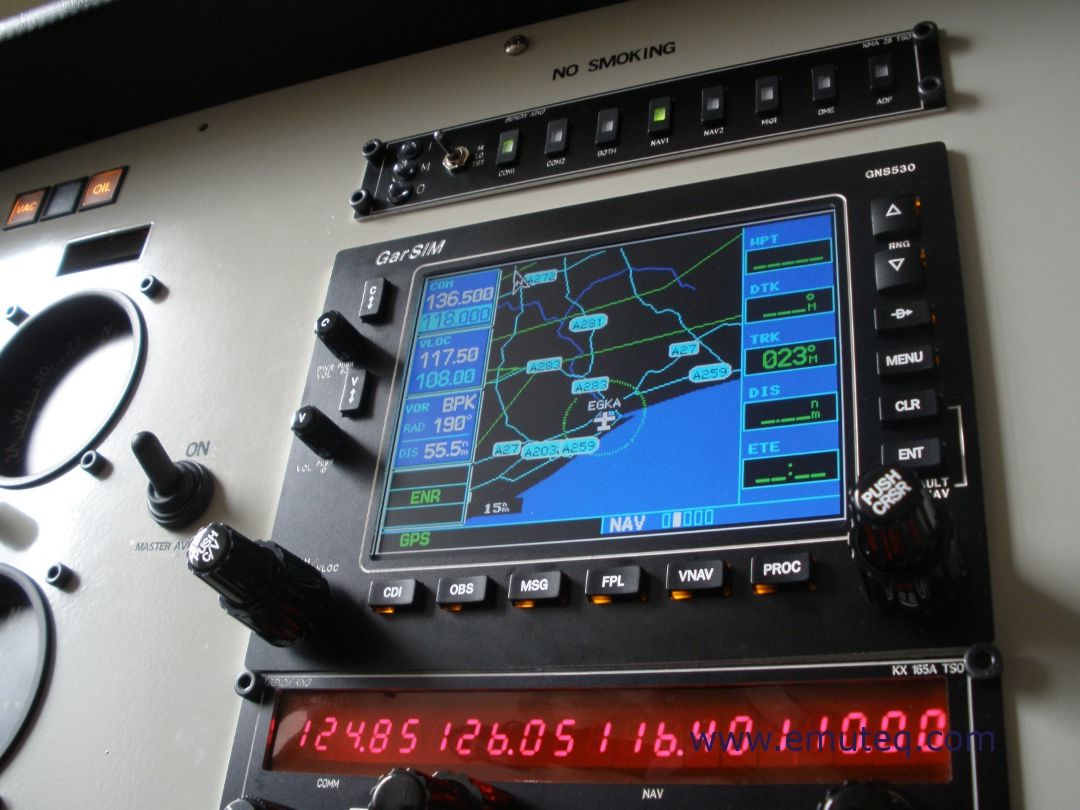
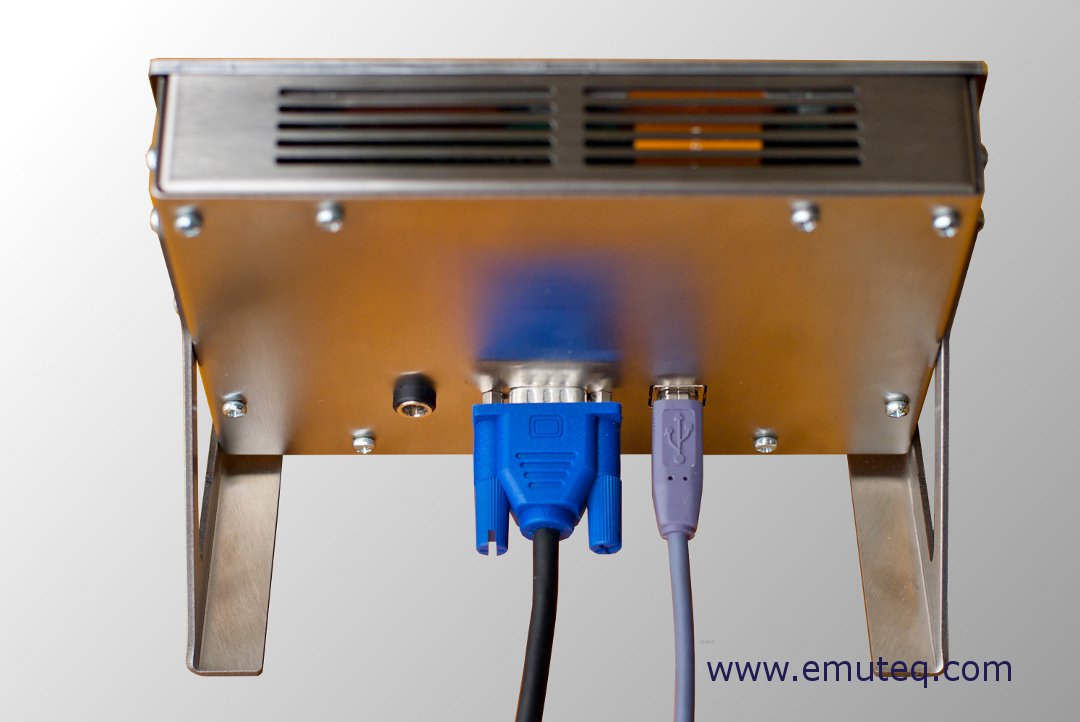
Its features are as follows: USB interface, 5.6-inch display, adjustable backlight, optional 12V external power, detachable mount, Software compatible with X-Plane, FS2004, FSX, RealityXP, FlyThisSim
By the way, emuteq also has a G1000 product, priced at £2,200, which also looks incredibly cool.
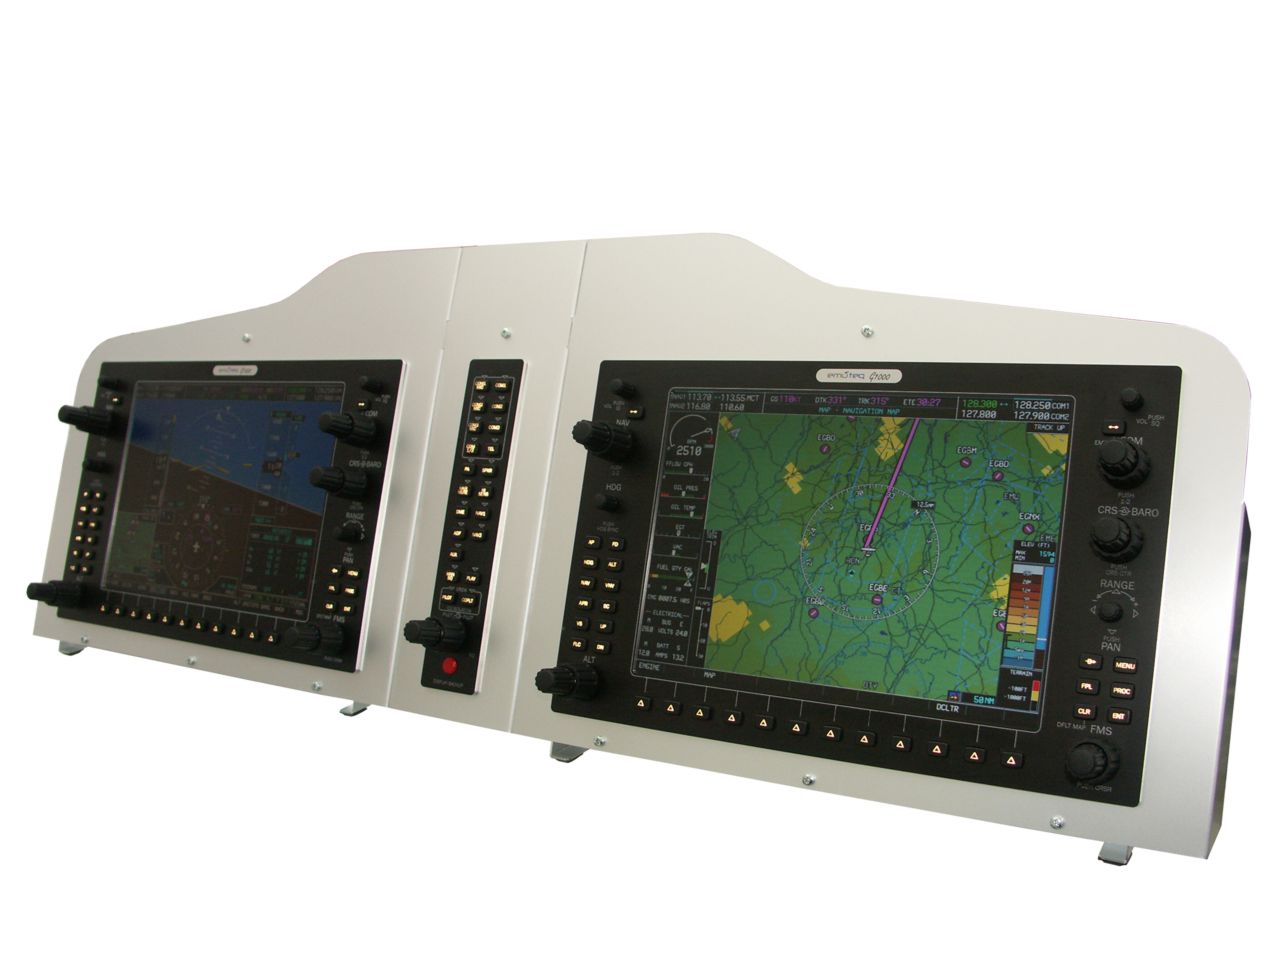 After seeing the G1000, looking at the G530, the price of less than £500 doesn’t seem too high after all (anyway, I can’t afford either…)
 -
VR INSIGHT - FLIGHT MASTER YOKE III
This VR INSIGHT - FLIGHT MASTER YOKE III on simMarket looks well-built, and it has a lot of buttons, basically combining the functionality of a Saitek flight stick and throttle quadrant with a flight switch control panel.
Yoke control, main power and battery switches, instrument switches, engine start, brakes, fuel pumps, beacon light, navigation lights, strobe lights, taxi light, landing lights:
.jpg)
Flaps lever, trim wheel, throttle lever, landing gear lever:
.jpg)
.jpg)
-
Spotted a Full 737 Flight Simulator Cockpit
Not an ad, just a personal interest. This Fei You Bang Store has a Boeing 737-800 simulator full cockpit, priced at 280,000 RMB, which I think is quite interesting.
Boeing 737 Items and quantities included: 737NG Metal cockpit shell and floor 1 737NG Dual-seat main panel and CDU panel 1 737NG Full-motion metal throttle quadrant 1 737NG Linked metal rudder pedals 2 737NG Linked yokes 2 737NG Forward overhead panel 1 737NG Aft overhead panel 1 737NG Metal simulation seats 2 737NG Complete full-function pedestal 1 I don’t know which flight simulation software it supports, and it seems screens and projectors are not included. The photos are too small to judge the build quality.
-
High Quality, Not Cheap: Airbus Sidesticks
I saw an Airbus A320 Sidestick – A320PROSRV2.0 by ACC.WORLD on SimMarket, The appearance is very realistic, but the price is also staggering, It costs 900 euros, and I don’t know how its performance is.
I couldn’t find any videos about this product on YouTube either, and I don’t know why. Here, let’s just take a look at some beautiful pictures from SimMarket.
I can’t find any product reviews, so I really don’t dare to buy such an expensive peripheral, So I will just give a brief introduction here. If you buy this product, please be sure to let this site know your user experience.
-
The Affordable and High-Quality Gladiator Joystick
I saw a Gladiator MK II Joystick launched by VKB SIM on xplane.org. It is priced at only $99.95, but it looks beautiful, and it has a lot of buttons—17 in total—including dedicated buttons for engine start, Throttle, and Flaps control. With mode switching, it effectively offers 27 buttons, which is basically sufficient for general flying.


This joystick is named after the Gloster Gladiator fighter, indicating that it was originally designed for playing combat flight games, so it also features numerous buttons for weaponry. The Gladiator was a British biplane Spiral fighter produced in the 1930s; the Chinese Air Force once used it during World War II to shoot down 48 invading Japanese aircraft.
-
Modifying the Saitek Flight Joystick
I was somewhat dissatisfied with the force feedback on my Saitek flight yoke, so I opened up the casing and made some minor modifications. Below is a quick summary of the process.
First, let me complain about the Saitek yoke’s issues. My dissatisfaction stems mainly from the Pitch and Roll operations, especially when in the neutral position. The internal springs are too stiff, requiring a certain amount of force to move them from the initial position every time. This leads to over-inputting force during precise attitude adjustments, such as during takeoff or landing, making it impossible to accurately control Pitch and Roll.
-
A Look at Various Home Cockpit Hardware for Flight Simulation 1
I usually only have time to play flight simulation on weekends. Most of the time, I fly small aircraft like the C172, and only occasionally fly airliners.
After all, there are too many things to control in a large aircraft. I generally use X-Camera to preset several views, such as the forward view, Upper Panel View, CDU View, etc. I use the Joystick to switch viewpoints, but I still need to click around with the mouse, which lacks a sense of realism.
-
How to Configure the Saitek Pro Flight BIP in X-Plane
The Saitek Pro Flight Backlit Information Panel (BIP) uses a backlit information panel to provide users with over 50 information commands, such as engine, fuel, electrical, and Autopilot status. Users can customize their information panel to display aircraft-related information and allow different commands to display in different colors (Red, Green, Amber) according to personal preference.

I don’t have a BIP on hand, but Mr. Charles Washington from Taiwan provided valuable setup documentation. Therefore, I have summarized it here for everyone’s reference. Mr. Charles Washington’s original draft is here.
-
A More Realistic Flight Sim Mount Volair Sim™ Cockpit
I stumbled upon the Volair Sim™ Cockpit, which is a fantastic piece of equipment. It not only secures three monitors and various Saitek devices but also includes a seat and a stand for your PC. It can truly be described as a complete solution. Let’s just look at the pictures: <img src=http://cache.nebula.phx3.secureserver.net/obj/RjM5QTY4MEY1OTk2MUE3QzY3NkE6N2IxZDRkZTRiMzNlOGNkODBjYmMyN2JhYjBhZGJkNWU=>
I watched the instructional video on YouTube,
and if you have enough space at home, this really is an ideal product.
The price of this product isn’t too high either—at $579. Quite a reasonable setting, wouldn’t you say? You can take a look at this feature comparison table:

-
Wheel Stand Pro for Saitek Pro Flight Yoke System - Deluxe V2
I recently bought another hardware stand, the Wheel Stand Pro for Saitek Pro Flight Yoke System. It is a custom-made, collapsible stand specifically designed for Saitek, capable of mounting all my existing equipment together:
Saitek Pro Flight Yoke Saitek Throttle Quadrant Saitek Pro Flight Rudder Pedals Saitek Pro Flight Cessna Trim Wheel Saitek Pro Flight Radio Panel
When in use, simply unfold it and place it in front of your computer screen. When not in use, just fold it up (takes no time at all) and store it away.

-
Saitek Cockpit - The Ultimate Flight Simulation Hardware
Saitek has finally launched a heavyweight product in flight simulation equipment, a complete cockpit hardware solution.
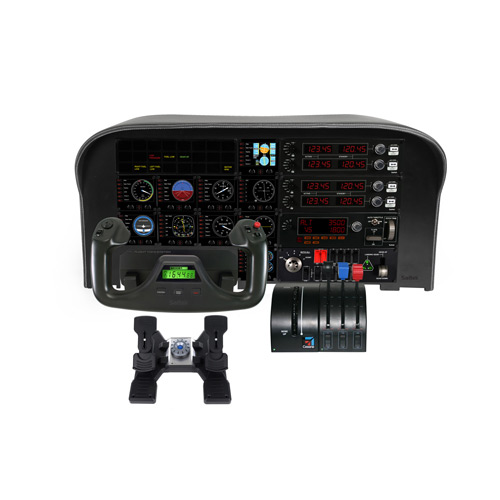
This product includes:
10 instrument panel units, each featuring a 3.5-inch LCD screen that can display the following data in real-time: Airspeed Indicator Attitude Indicator Altimeter Turn/Slip Indicator Horizontal Situation Indicator Vertical Speed Indicator PFD: Primary Flight Display VOR 1 VOR 2 Engine Gauges
1 Civil Aviation Flight Yoke (Saitek Pro Flight Yoke)

 1 Throttle Quadrant (Saitek Three Lever Pro Throttle Quadrant)
1 Rudder Pedals (Saitek Pro Flight Rudder Pedal)
1 Trim Wheel (Saitek Pro Flight Cessna Trim Wheel)
2 Radio Panels (Saitek Pro Flight Radio Panel)
1 Switch Panel
1 Standalone Throttle Quadrant
1 Autopilot Panel
1 Throttle Quadrant (Saitek Three Lever Pro Throttle Quadrant)
1 Rudder Pedals (Saitek Pro Flight Rudder Pedal)
1 Trim Wheel (Saitek Pro Flight Cessna Trim Wheel)
2 Radio Panels (Saitek Pro Flight Radio Panel)
1 Switch Panel
1 Standalone Throttle Quadrant
1 Autopilot Panel -
Flight Sim Hardware Stand: Wheel Stand Pro Stand for Saitek Pro Flight Yoke System
I found this hardware stand on Amazon - Wheel Stand Pro Stand for Saitek Pro Flight Yoke System
It allows you to integrate the Saitek flight yoke, throttle quadrant, rudder pedals, trim wheel, radio panel, and other peripherals all together.
It is absolutely perfect. Plus, the price isn’t too expensive. Including shipping, it’s just 250 to 300 USD, which is quite attractive to me. I’m considering whether to get one…
-
Personal Hardware Device Setup Memo
With the accumulation of hardware, the settings have also increased, and over time, I’ve even forgotten them myself. Today, taking advantage of a rest day, I will summarize them here for future reference.
Below are the settings for flying a small propeller aircraft. The equipment used includes: Saitek Pro Flight Yoke Saitek Three Level Pro Throttle Quadrant Saitek Pro Flight Rudder Pedals Saitek Pro Flight Cessna Trim Wheel Saitek Pro Flight Radio Panel CH Products Fighterstick USB
-
New Version 2.21 of the Xsaitekpanels (lin+win+mac+32/64) Plugin
I have previously introduced the setup method for the Saitek Pro Flight Radio Panel. Recently, I checked the org store again and found that the plugin version has been updated rapidly, upgrading from 2.04 to 2.21. It seems quite a few bugs have been fixed, so I downloaded and updated it again to give it a try.
The new version feels slightly more stable than before. Previously, if used for a longer period, the data on the display might appear garbled. After the upgrade, it feels like this issue has been resolved.
-
Summary of Peripherals I Use in X-Plane 10 (Yoke, Throttle, Pedal, Trim, TrackIR, Radio Panel)
I use a 27-inch iMac myself. It started with 4GB of RAM, which I later upgraded to 12GB, and 1GB of video memory. It’s a completely standard configuration. This hardware is basically sufficient, but since the iMac’s built-in graphics card isn’t great, I can only say it’s “adequate.” With the 3D cockpit enabled, the display speed generally hovers around 20-40 fps.
Regarding peripherals, because I place a lot of importance on the realism of flight, I bought the following specialized Saitek peripherals.
