Modifying the Saitek Flight Joystick
I was somewhat dissatisfied with the force feedback on my Saitek flight yoke, so I opened up the casing and made some minor modifications. Below is a quick summary of the process.
First, let me complain about the Saitek yoke’s issues. My dissatisfaction stems mainly from the Pitch and Roll operations, especially when in the neutral position. The internal springs are too stiff, requiring a certain amount of force to move them from the initial position every time. This leads to over-inputting force during precise attitude adjustments, such as during takeoff or landing, making it impossible to accurately control Pitch and Roll.
Additionally, when the controls are deflected from the neutral position, maintaining the current state requires even more force to pull or push the yoke, causing my arms to get sore after a short while.
When practicing in an actual Cessna 172 or Piper PA28, the control forces felt much lighter. So, this time, I decided to take the yoke apart and improve it.
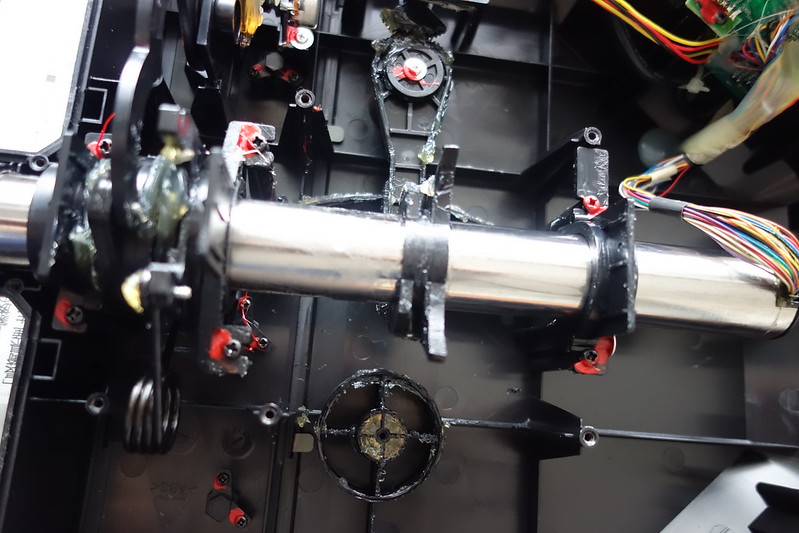
Step 1: Remove the back cover
Turn the yoke over and look at the bottom; there are over a dozen screw holes. Use a Phillips screwdriver to remove them; there are 14 in total.
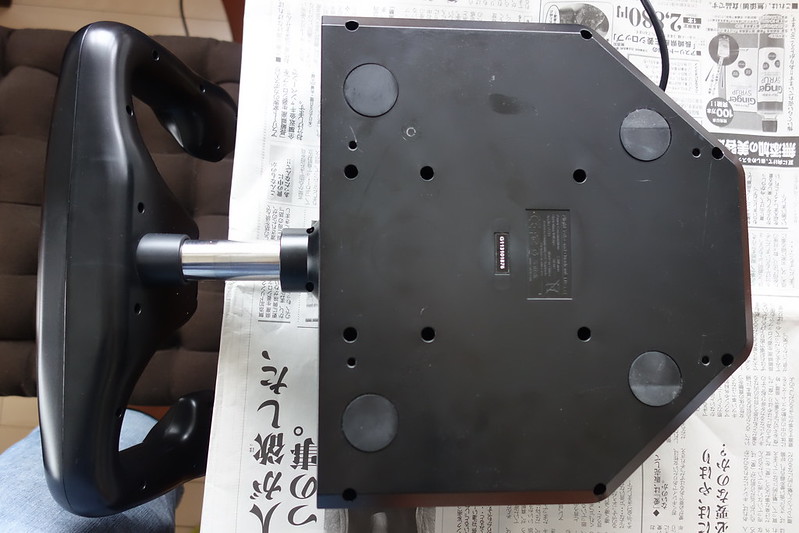
Once the screws are removed, you can open the back cover as shown below.

Step 2: Remove the original stiff springs
The spring controlling Pitch force feedback. Note that although not visible in the picture, there are actually two springs, one top and one bottom.
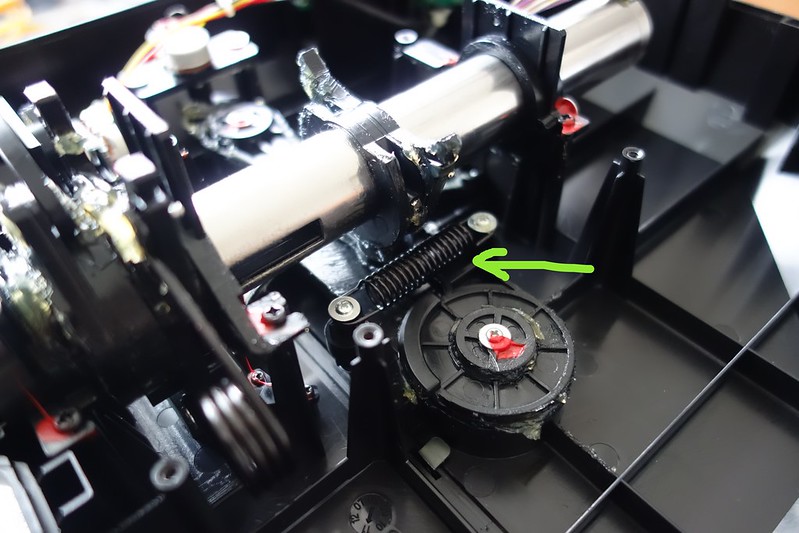 The spring controlling Roll force feedback.
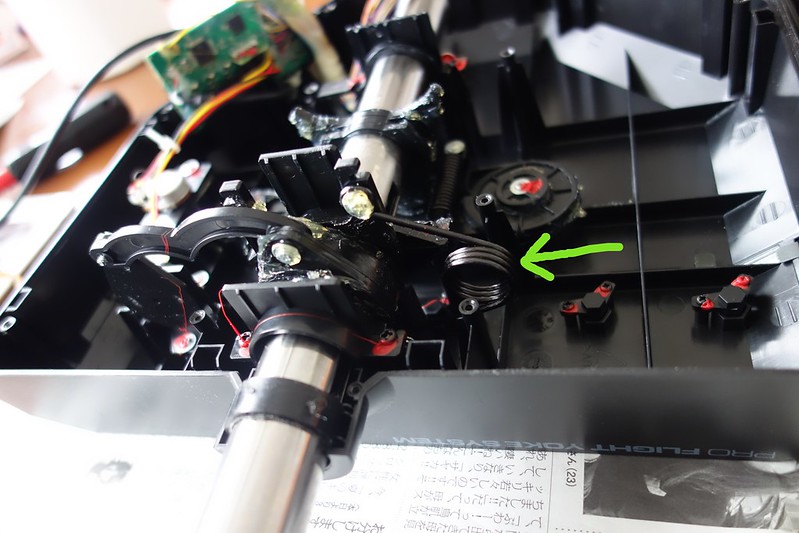
Use small pliers to remove the springs.
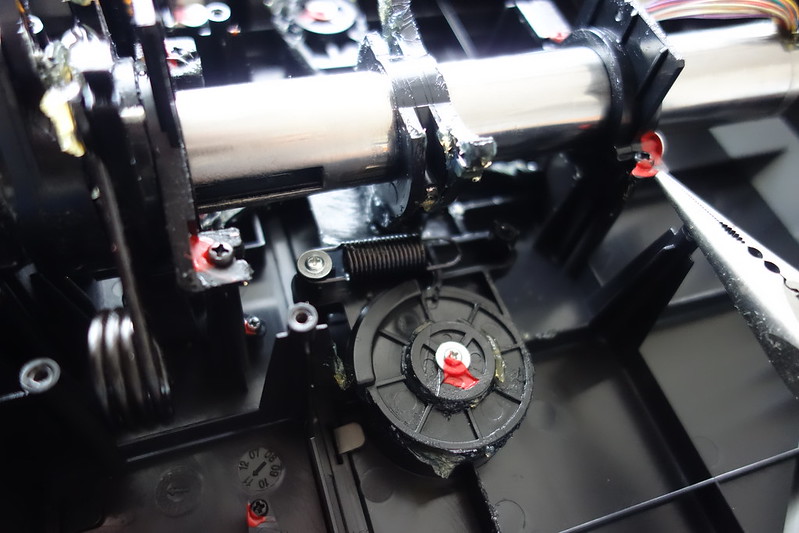
This is what it looks like after removing both Pitch springs.
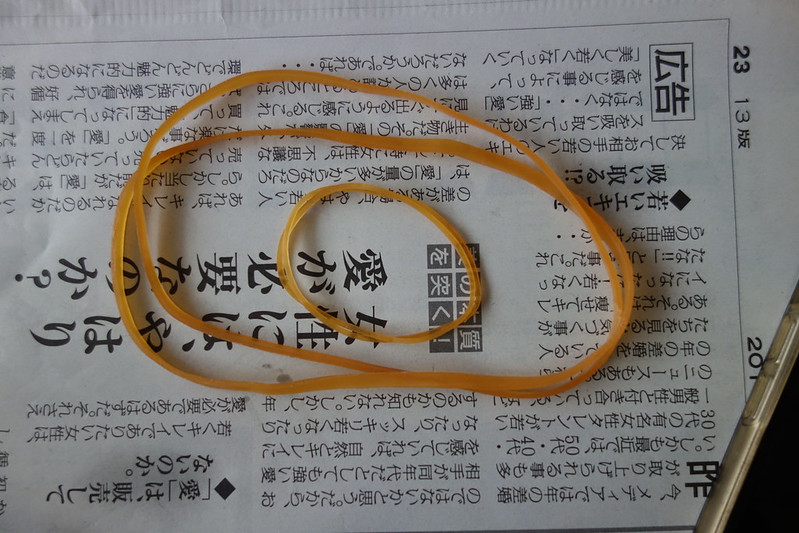
Step 3: Use rubber bands as Pitch and Roll force feedback devices
The rubber bands used are shown below.
There are 3 small tabs on the Pitch axis. Wrap one long rubber band around the left and middle tabs, and use another long rubber band to wrap around the right and middle tabs.
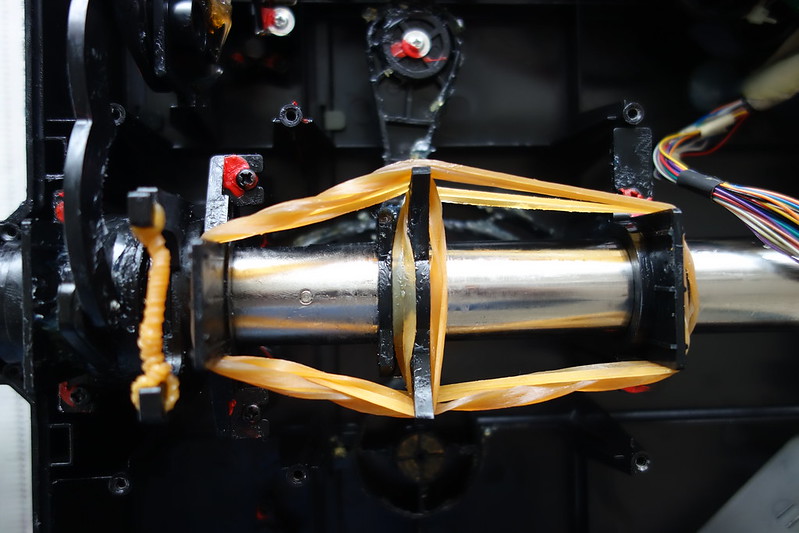 I tested the tension and felt it was a bit too light, so I used another long rubber band to wrap around the left and right tabs.
For the Roll axis force feedback, use 2 short rubber bands wrapped around the connection point of the original springs.
The removed parts are shown below.

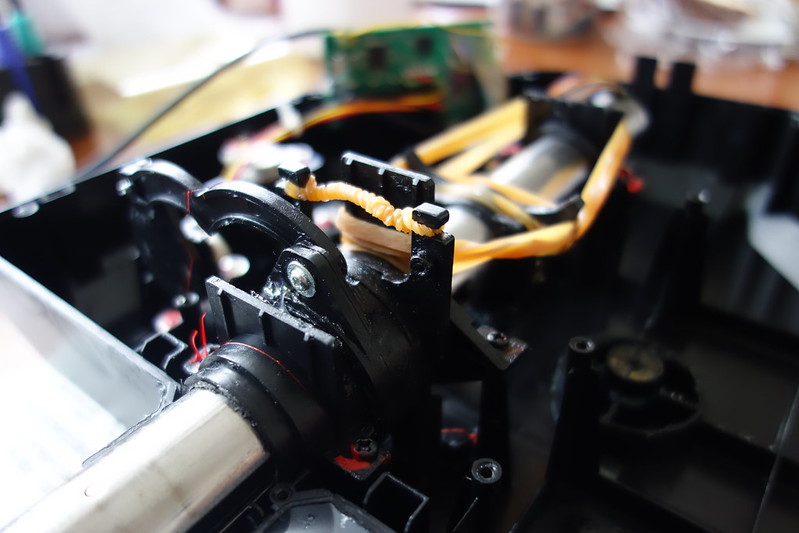
Step 4: Reassemble the back cover
Put the back cover back in place and secure it with the original 14 screws.
I connected the yoke to X-Plane for a test flight and found that changing the control deflection angle is indeed much easier now. Perhaps because I was used to the old way, the sudden lightness felt a bit unfamiliar at first. However, I chose an airport and practiced a few circuits of touch and go, and the handling felt pretty good during landing. I will need to fly more in the future to summarize my experience and make further adjustments if necessary.
The online resources referenced for this modification are as follows: http://flyingtak1.exblog.jp/16801121/ http://flyingtak1.exblog.jp/16780437/ https://www.youtube.com/watch?v=C2rhTPCmw1s https://www.youtube.com/watch?v=a0xNAd73BHo
On a side note, yesterday the world-famous computer peripheral manufacturer Logitech acquired Saitek. This means Saitek has parted ways with Mad Catz to become part of the Logitech family. With a financially strong company like Logitech as its backbone, I have high hopes that Saitek will continue to launch affordable and high-quality flight simulation products. After all, their product line updates have been too slow in recent years. According to Mad Catz’s announcement, the acquisition price for Saitek was $13 million, covering the product lines for flight, space, and agricultural flight simulation game peripherals. Additionally, 8 employees will transfer to Logitech.