How to Configure the Saitek Pro Flight BIP in X-Plane
The Saitek Pro Flight Backlit Information Panel (BIP) uses a backlit information panel to provide users with over 50 information commands, such as engine, fuel, electrical, and Autopilot status. Users can customize their information panel to display aircraft-related information and allow different commands to display in different colors (Red, Green, Amber) according to personal preference.

I don’t have a BIP on hand, but Mr. Charles Washington from Taiwan provided valuable setup documentation. Therefore, I have summarized it here for everyone’s reference. Mr. Charles Washington’s original draft is here.
First, there are two Plugins to download. One is the Xsaitekpanels mentioned earlier, which can be downloaded from the org official website. Unzip the package and copy the Xsaitekpanels directory from inside Xsaitekpanels_2_42 to the plugins folder in your X-Plane Resources directory.
You can see there are 3 files under Xsaitekpanels:
D2B.config.txt
D2B.config2.txt
D2B.config3.txt
Each file corresponds to one BIP device. If you only have one, D2B.config.txt is the one used.
Let’s look at the content of D2B.config.txt, for example:
This will turn on the top row first indicator red if the first geterator is off
#SET BIP A 0 R FROM  ARRAY sim/cockpit2/annunciators/generator_off 0 RANGE 1 TO 1
This will turn on the top row second indicator red if the voltage is low
#SET BIP A 1 R FROM  DATAREF sim/cockpit/warnings/annunciators/low_voltage RANGE 1 TO 1
This will turn on the top row third indicator red if fuel is low
#SET BIP A 2 R FROM  DATAREF sim/cockpit2/annunciators/fuel_quantity RANGE 1 TO 1
This will turn on the top row fourth indicator red if the parking brake is on
#SET BIP A 3 R FROM  DATAREF sim/cockpit2/controls/parking_brake_ratio RANGE 1 TO 1
This will turn on the middle row first indicator if oil pressure is low
#SET BIP B 0 R FROM  ARRAY sim/cockpit2/annunciators/oil_pressure_low 0 RANGE 1 TO 1
This will turn on the middle row second indicator is oil tempature in high
#SET BIP B 1 R FROM  ARRAY sim/cockpit2/annunciators/oil_temperature_high 0 RANGE 1 TO 1
This will turn on the middle row third indicator if the vacuum is low
#SET BIP B 2 R FROM  DATAREF sim/cockpit2/annunciators/low_vacuum RANGE 1 TO 1
This will turn on the middle row fourth indicator if the auto pilot is turned off
#SET BIP B 3 R FROM  DATAREF sim/cockpit2/annunciators/autopilot_disconnect RANGE 1 TO 1
Actually, its syntax is quite easy to understand.
It uses the #SET command to assign values to each display cell of the BIP. For example:
#SET BIP A 1 R FROM DATAREF sim/cockpit/warnings/annunciators/low_voltage RANGE 1 TO 1
sets the BIP’s “A 1” panel, i.e., the second unit in the first row, to Red (R).
It lights up that small panel when the value is 1, based on whether the system voltage is too low.
Because the BIP panel has 3 rows, with 8 display windows in each row, the number for each small window is A0-A7, B0-B7, C0-C7.
Color values are R for Red, G for Green, and A for Amber.
Users can freely edit D2B.config.txt according to their needs to get the desired effect,
but this method is indeed somewhat troublesome, which is why there is a second convenient Plugin: D2B-Tool for Xsaitekpanels BIP.
D2B-Tool for Xsaitekpanels BIP can be downloaded from the org official website.
It provides a GUI, so users don’t have to write code line by line themselves,
but can intuitively set the required data source for each display window.

The installation method is as follows: Download D2B-Tool 1.0.rc2 Mac OS X.zip and move it to X-Plane 10\Resources\Plugins.
Then execute D2B-Tool.app inside the D2B-Tool for Xsaitekpanels BIP 1.0.rc2 directory, and you will see the following screen.
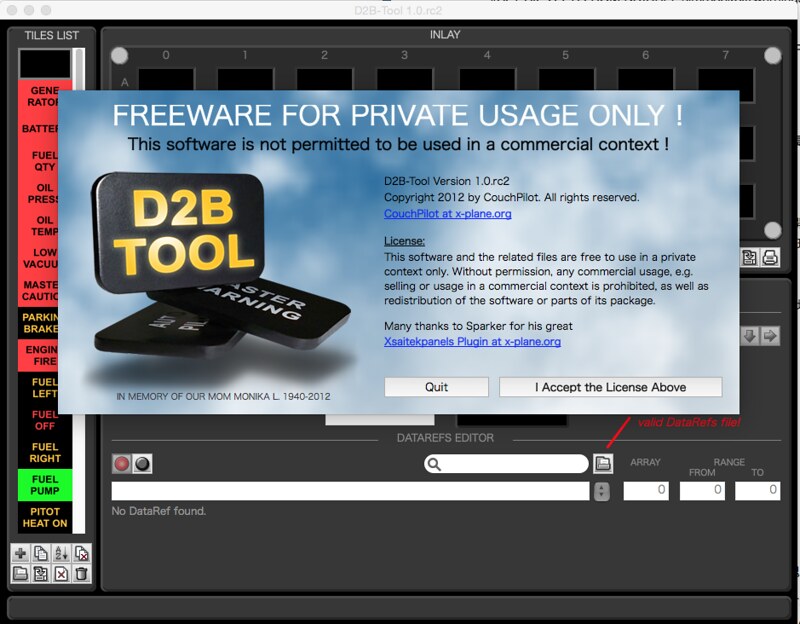
Click “I Accept the License Above” to enter the Plugin settings screen.
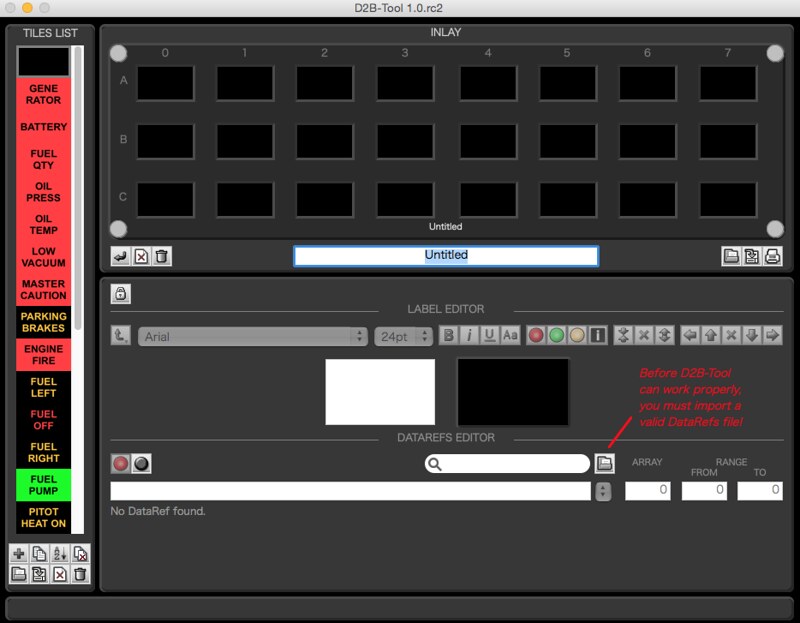 You can see an empty virtual panel in the INLAY section. The TILES LIST on the left is the list of available panel windows,
the LABEL EDITOR in the middle allows you to configure the display for each small panel,
and the DATAREFS EDITOR at the bottom allows you to set the data source for that display window, such as the
You can see an empty virtual panel in the INLAY section. The TILES LIST on the left is the list of available panel windows,
the LABEL EDITOR in the middle allows you to configure the display for each small panel,
and the DATAREFS EDITOR at the bottom allows you to set the data source for that display window, such as the sim/cockpit/warnings/annunciators/low_voltage mentioned above.
Try opening the D2B.config.txt from earlier using the Open Inlay Config option in the D2B-Tool File menu.
Find X-Plane 10\Resources\Plugins\Xsaitekpanels\D2B.config.txt
You should see the following screen:
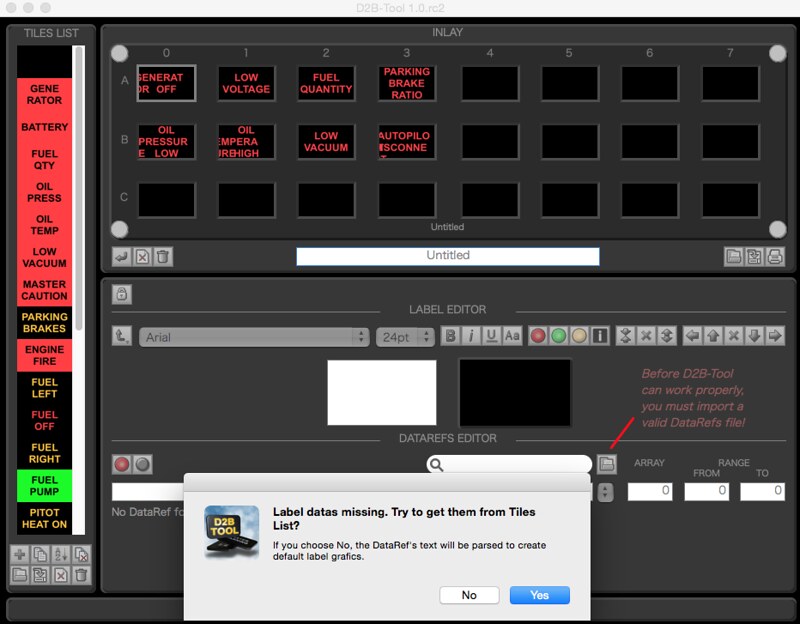
Click Yes, and you can see that the configuration information from the text above is perfectly represented in GUI form.

The 24 small windows are still empty, so use the mouse to drag all the unused items from the TILES LIST on the left into the INLAY area,
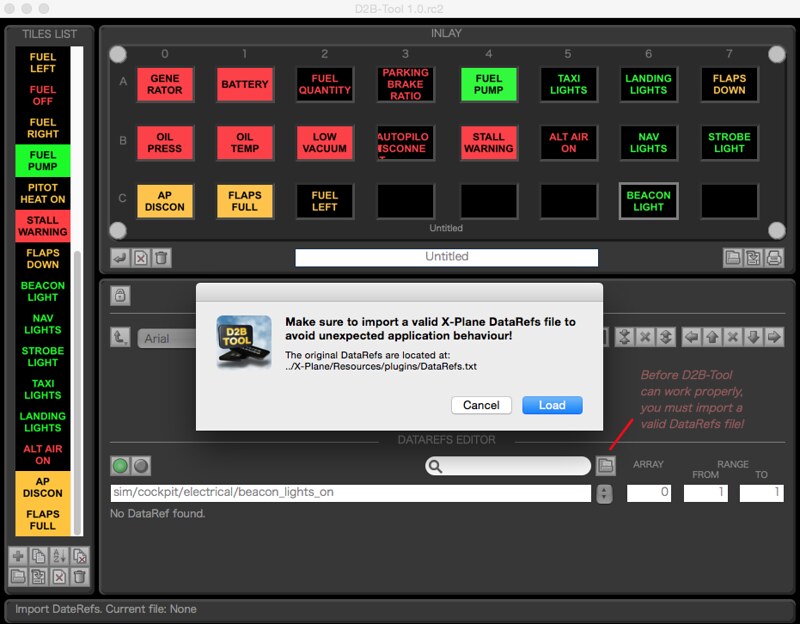
and load the data source definition file. This is the load button in the DATAREFS EDITOR shown below.
Press Load, then select the Resources/plugins/DataRefs.txt file.
After setting up all the panels, simply use Save Inlay Config in the File menu to save.
Additionally, the BIP only provides 50 default display inserts. If you want to create your own custom panels, it seems you can edit them in the middle LABEL EDITOR, print them out using a printer, and stick them onto the BIP.
Thanks again to Mr. Charles Washington for providing the materials!