Cessna C172 Flight Training in Hawaii (Real Flight)
I recently took a short vacation to Hawaii and managed to squeeze in an hour of flying, mainly to see if my understanding of flying had improved through practicing with X-Plane. This time, I booked with a very small flight school run by a Japanese owner, because the company I flew with last time didn’t have a Cessna, and after all, I haven’t flown a 172 yet.
This flight school has two fixed-wing Cessnas and a Robinson R44 helicopter. Besides teaching flying, their main business is sightseeing flights for tourists. I chatted with the owner for a while, asking about training prices and the flight hours required to get a PPL. It was interesting that he said Western tourists almost 100% choose the helicopter, while Japanese tourists almost 100% choose to fly the Cessna. The reason for such a huge difference is mainly Japan’s strict laws; you cannot experience flying domestically in Japan, so aviation enthusiasts have to come to Hawaii to get their fix. Since the owner knew I had previous flight experience, he didn’t introduce any basics and we went straight to the Apron.
My instructor this time was Mike. He speaks a little Japanese. We basically communicated in a mix of English and Japanese, and I felt there was no major language barrier. Mike asked if I wanted to tour the island or do flight training. I said, “Of course, training.” Mike asked with a smile, “Maneuver?” “Yeah!” “OK, let’s go.”
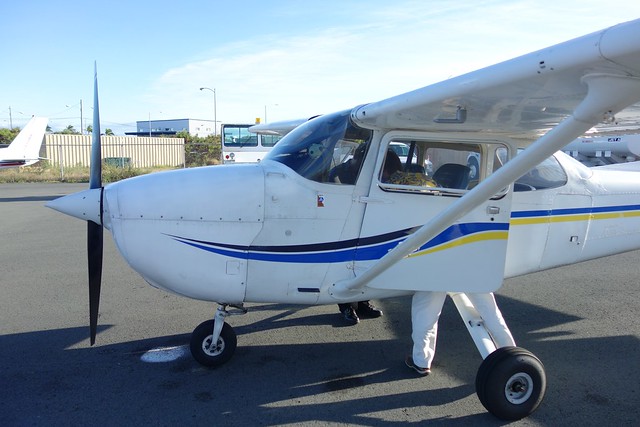
We came up to this Cessna 172N Skyhawk2. The airframe is very old, manufactured in 1976, but it looked like it had been repainted recently and was quite pretty.
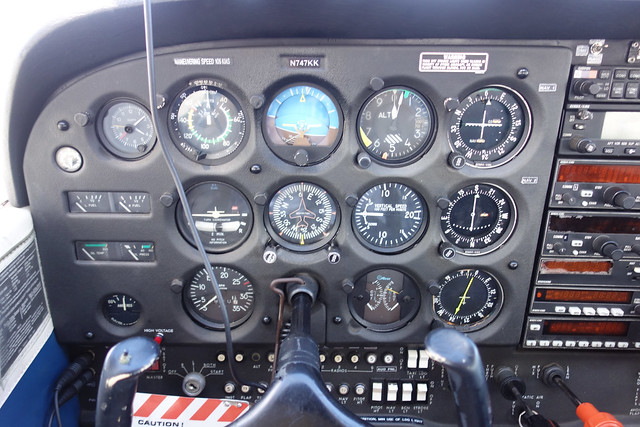
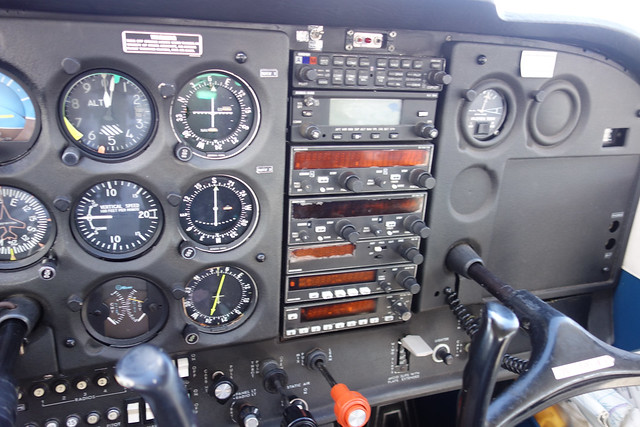
Mike asked me to sit in the left seat, showed me how to fasten the seatbelt, how to open and close the windows and doors, adjust the seat distance, put on the headset, and then he sat in the right seat. I looked at the instrument panel. Well, it was indeed a bit old, but it was no different from the flight simulator. I recognized every gauge, so I felt much more relieved.
Mike said, “Come on, let’s do the checklist,” and took out the POH and the checklist. Since he had already done the walk-around inspection and weight and balance calculations, we only did the cockpit part of the Preflight inspection. Ignition Switch – OFF Avionics Power Switch – OFF Master Switch – ON And so on. I won’t list every item here.
Mike was very friendly. He read most of the items, but let me do the actions. He only stepped in to explain if I didn’t understand something, which suited me perfectly. After the “Before Starting Engine” section, it was time to start the engine. I couldn’t help but feel a surge of excitement. Huh? The engine hasn’t started yet, why is the plane shaking violently??
I looked at Mike in confusion. Mike pointed ahead of the Apron. Oh, a Twin Otter DHC-6 had taxied in front of us at some point. The prop wash from its two engines was so strong that we were shaking severely even on the ground!
Next, we executed the “Starting Engine” checklist. Mixture Rich, Carburetor Heat Cold, Master Switch On. Then came the Primer. I pressed it three times to inject fuel, then turned the Primer knob half a turn to lock it. This locking operation for the Prime is something you can’t do in flight simulation software; without actually operating it, it’s really hard to imagine what it’s like.
Next, I pulled the Throttle out a bit. Seeing no one in the Propeller Area, I called “Clear”. “Alright, you start the engine.” Mike, you really trust me to handle this! Of course, I didn’t stand on ceremony. I inserted the key and turned the Ignition Switch to Start! The engine roared to life on the first try—it was very cooperative. The engine sound felt relatively smooth, and the Oil Pressure was normal. Everything went smoothly!
Next was “Before Takeoff,” etc. I won’t write down every item. What impressed me most was listening to the ATIS. The speaking speed was too fast, and my listening skills really aren’t good enough. I only caught the QNH 2999 and the wind was 020. I genuinely couldn’t keep up with the rest. Luckily, I have an app.
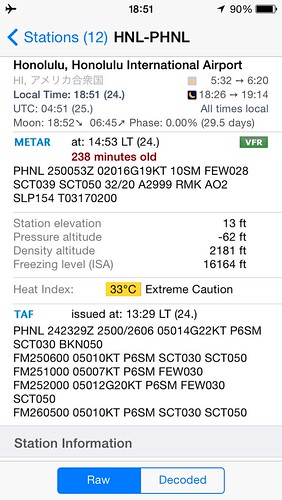 Oh, the wind is strong…
The flight control check made the 172’s Yoke and Rudder feel very light, not effortful at all. The operation was similar to my Saitek sim equipment, with no real sense of discrepancy. Of course, I know the Saitek Yoke’s pitch and roll auto-center to zero, while the real aircraft stays in place, but this difference doesn’t have a huge impact on handling.
Oh, the wind is strong…
The flight control check made the 172’s Yoke and Rudder feel very light, not effortful at all. The operation was similar to my Saitek sim equipment, with no real sense of discrepancy. Of course, I know the Saitek Yoke’s pitch and roll auto-center to zero, while the real aircraft stays in place, but this difference doesn’t have a huge impact on handling.
I was definitely even less capable with the subsequent ATC. I left the clearance and Tower calls to Mike and just listened to his instructions. It seemed the Runway was 4R, and we took Taxiway C to exit F. Mike really trusted me during the taxi phase and left it all to me. Thank you so much. Please refer to here for the Honolulu airport diagram.
I released the brake and toe brakes, and pressed the Rudder lightly with my right foot. After all, I knew about this propeller effect from when I first started playing X-Plane. I controlled the Rudder to keep the plane moving along the centerline. Basically, no swerving side to side. How did I complete all these operations so naturally!
Passing through E and D to the entrance at F, I turned the nose to face the Runway and stopped. Mike contacted the Tower and got “Cleared for Takeoff.” Finally, we could take off!
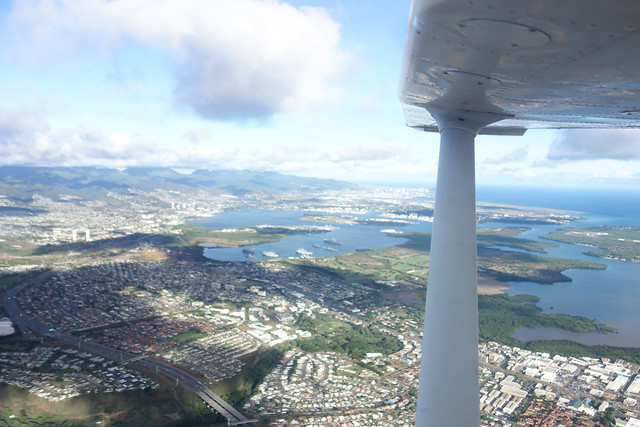
I turned onto the Runway and executed the Normal Takeoff checklist. Flaps 10. Oh, the Flaps switch is so light (after all, you can’t experience touch in flight simulation…). Carburetor Heat Cold, Throttle FULL OPEN! I pushed the throttle to the full stop, and the plane began to move. It quickly reached the rotation speed of 55 KIAS. I pulled back on the Yoke. Given the strong headwind, the plane felt like it lifted off immediately, and the Climb was extremely fast. With such a high headwind speed, the plane’s ground speed felt very, very slow. Stealing a moment of leisure, I glanced down at Honolulu International Airport—it was beautiful, beyond words. Also, the turbulence today was really severe, bumping up and down. My feeling at the time was like sitting in a small boat, drifting on a turbulent sea…
You might ask if I felt dizzy or nauseous. Not at all. At the time, I didn’t have time to experience the bumps; my energy was fully concentrated on flying. It seemed my body’s adverse reactions couldn’t reach my brain!
Next, Mike reminded me to maintain a climb rate of 500 feet/min and maintain the Runway Heading of 040. The altitude seemed to be about 800 feet. Then he told me to turn left; we were off to the training area. He adjusted the bug on the Heading Indicator to 320 and told me to turn to that heading. At this moment, it was strange. I naturally turned the Yoke while gently pressing the Rudder with my left foot, and my eyes unconsciously went to the Turn Coordinator. It seems playing X-Plane did have some effect.
While I was flustered, Mike must have finished the ATC communication. It seemed the plane had left the Honolulu Class B airspace. Anyway, I really couldn’t keep up with his ATC calls… The Sectional Chart here can be found on <a href=https://skyvector.com/?ll=21.3178275,-157.920263139&chart=301&zoom=1>SkyVector.
Approaching 2000 feet, Mike said we would start maneuvers. First, Level Flight (level off) at 2000 feet. Following the pitch/power/trim sequence, I lowered the Yoke, reduced the throttle to 2200 rpm, and adjusted the trim. The altitude leveled off around 2000 feet. Then we executed the Cruise checklist: Power 2200 rpm, Trim adjusted, Mixture Lean. Everything went smoothly.
At this point, Mike taught me how to observe the outside horizon and the instrument panel glare shield. He held out his palm and told me to use four fingers to judge attitude. In other words, when the top of the glare shield plus the height of four fingers aligns with the horizon, it is Level Flight. Don’t always stare at the instrument panel. I knew the 90/10 rule—spend 90% of the time looking outside and 10% looking at instruments—but my actual flight time is low. My experience and feeling are insufficient, so I couldn’t help but look at the instruments. This bad habit couldn’t be changed overnight… So Mike blocked the instrument panel with the checklist, making me focus outside and use the terrain to understand flight attitude. Very grateful. However, the wind was really strong today; the altitude just wouldn’t stabilize up and down. “Good enough” was fine.
Seeing that I could maintain Level Flight, Mike said “Left turn Heading 250.” Okay, the practice of coordinated turns began. I chose a bank angle of 20 degrees, pulled the Yoke back slightly, and checked the ball in the Turn Coordinator. Mike reminded me to use the angle between the horizon and the instrument panel glare shield to judge the bank angle and not to lose altitude. However, due to the wind, it was shaking badly today. Also, the control pressure wasn’t too high, not much different from the Saitek Yoke.
Next, we practiced a few circuits of right and left turns. Mike probably thought it was passable and suggested we practice Climb. Pull back, full throttle, trim up. Then Descent. Throttle was about 1200, I don’t remember clearly. Anyway, the focus was still on using external terrain. Putting five fingers on the instrument panel glare shield to measure the horizon position basically gives a Descent rate of 500 feet/min. This method is great.
Seeing that my Climb and Descent were okay, Mike said we would practice Slow Flight. Great, this is essential for Final Approach. Throttle 1500 rpm, Fuel Selector Both, Mixture Rich, Carb Heat On. Flaps 10-20-30 (It turns out 30 requires sliding to the right to latch; this isn’t in flight sim either). I pulled back on the Yoke to maintain altitude for a while in Level Flight, then did some turns, added a little power, and finally the speed reached about 45 KIAS. It wasn’t as difficult as I imagined.
Next was Power Off Stall. The configuration was basically the same as above, Descent attitude, slowly pull the throttle to IDLE. Pull back on the Yoke, the speed slowed down. Mike reminded me to listen for the Stall warning horn. The sound was so small! I imagined (or rather, in the flight simulation software) this sound would be much louder and sharper. What was strange was that I didn’t feel scared at all. Perhaps because I used all my nerves on flying, I was numb to the Stall warning. Then I pushed the Yoke forward to reduce Angle of Attack (AOA). As the speed recovered, I retracted the Flaps and executed the Cruise checklist.
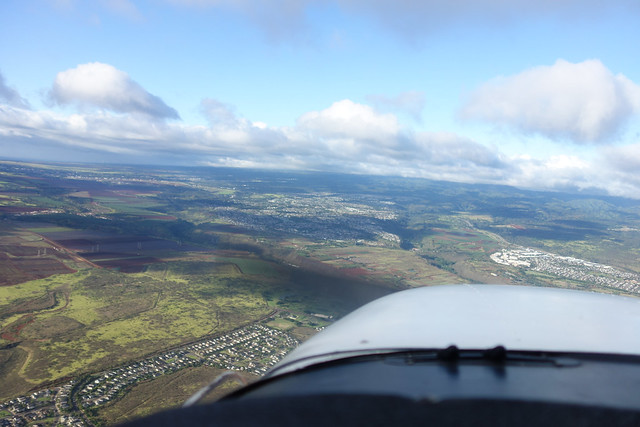
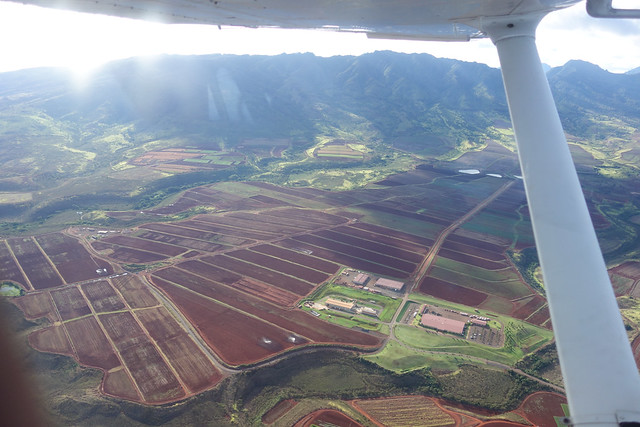
I knew the purpose of practicing Stalls was for landing. Sure enough, Mike pointed to the distance on the left and asked, “Can you see that thin grass road there? Let’s go there to simulate a landing.” I looked for about 20 seconds before finding that short, runway-like farm field in a large patch of green. We were currently Downwind for this “Runway”. We practiced Before Landing: safety check, Fuel Selector Both, Mixture Rich, Carb Heat On. Throttle 1200 (I forgot), Flaps 10, speed 75 (I forgot). Turn Base, Flaps 20, speed 65. Then turn Final. As the altitude gradually lowered and aligned with the Runway, at 500 feet, Mike shouted “Go around!” So I pushed the throttle Full, Carb Heat Off, Trim reset, retracted Flaps, etc., and gradually returned to altitude, back to around 2000 feet.
Mike then asked if I wanted to fly Steep Turns. I said, “Great!” Mike said with some surprise, “Oh, you know Steep Turns. Good.” Maintain altitude, 45 degrees bank. To maintain altitude, I had to pull back hard on the yoke. Oh, this angle is really big. So cool! After turning 180 degrees, I returned to Level Flight. I felt dizzy for an instant, but it passed quickly. Strange. It was my first time doing Steep Turns. The control pressure was obviously much higher than before, and I felt Mike helped a lot; I could feel his force on the Yoke, and we didn’t lose much altitude. I did a few more. When I did it alone, the altitude obviously dropped a bit, and I scrambled to recover some. Mike said it was not bad, thanks. Mike added later that we could add some power or some trim to save effort on the Yoke. Yeah, theoretically, I know that, but we ran out of time this time. Maybe next time…
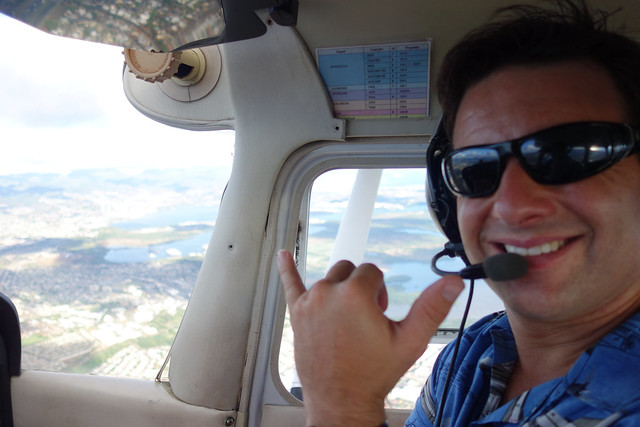
The hour passed quickly. Mike asked if I had a few minutes left and what else I wanted to practice. I suddenly remembered I hadn’t taken photos yet, so I hurriedly took out my beloved Sony RX100 and took a selfie with Mike. After all, it’s Hawaii, so we had to do an Aloha pose.
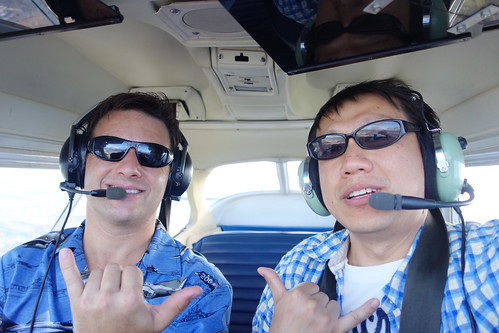

 Hawaii is truly beautiful!!
After doing so many exercises in just a few dozen minutes, my brain was already a bit numb, and my memory of the return trip isn’t very clear.
I gave up completely on ATIS and ATS. It should be RWY4R. The Normal Landing checklist has already been covered above, so I’ll skip it here. We turned southeast from the peninsula between East Loch and West Loch, flying over Ford Island in Pearl Harbor at a heading of approximately 150 degrees, passing between Honolulu International Airport and Hickam Air Force Base, entering the base leg. The approach was a Short Left Approach. The wind was really strong, and even after passing the runway threshold, the plane’s altitude was still coming down very slowly. Also, we were somewhat off the runway centerline, and I kept making adjustments with the rudder and yoke. By touchdown, we’d used less than half the runway length. I completely lost the feel for the final flare—Mike handled it all.
After landing, I carefully controlled the plane in a straight line and smoothly returned to the apron. The hour passed so quickly. I was sweating quite a bit and my brain was a bit foggy, but it was truly fulfilling.
Thank you so much, Mike!
The End