How to Create a VFR Flight Plan
I previously wrote a guide for IFR flying; today, having some free time, I thought I’d write another one, this time on creating a flight plan for Visual Flight Rules (VFR) in a small aircraft.
First, select a flight target. I’ve been on business trips to Osaka quite often recently, so I’m quite familiar with the area. Let’s start from Osaka and do a sightseeing flight. Osaka has a general aviation airport — Yao Airport RJOY — so we will take off from here. For the Destination, let’s choose Tokushima Airport RJOS in the south. This route allows us to pass over the bustling cities of Osaka and Kobe, see the famous Akashi Kaikyo Bridge and Naruto Bridge over the sea, as well as the beautiful natural scenery of Awaji Island. It is perfectly suitable for a sightseeing flight.
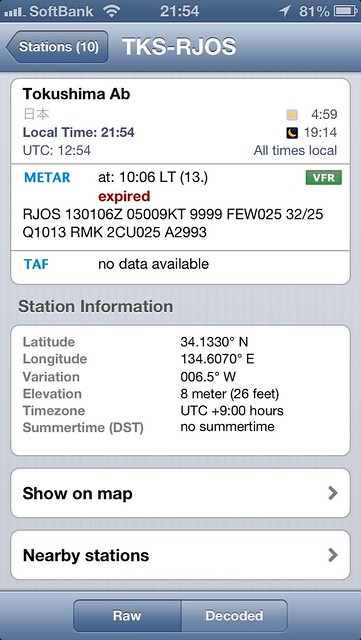
First, check the weather for both airports. The AeroWeather app on the iPhone is very convenient; METARs and TAFs are clear at a glance.

 If you are not familiar with weather report formats, you can refer to this introductory article on the site.
The weather at both locations meets VFR flight conditions: “Visibility of 5 miles or more, Ceiling of 3000 feet or more.” The wind speed is low, and there isn’t much cloud cover; it should be a good day for flying. Of course, the high temperature means a high density altitude, which degrades flight performance and results in a longer takeoff roll, but that’s no problem.
Next, look at the information for each airport. Airport coordinates, Departure procedures, Arrival procedures, Runway length, navigation facilities, ATC frequencies, etc., can all be found below: Yao Airport Tokushima Airport I won’t go into detail here. Listening to the ATIS and based on the wind direction, I decided to use Runway 27 for takeoff.
You should also check NOTAMs to see if there are any notices for the airports. I went to https://www.notams.faa.gov/dinsQueryWeb/ to check: Locations: RJOS, RJOY Data Current as of: Sat, 13 Jul 2013 13:50:00 GMT RJOS TOKUSHIMA No active NOTAMs for this location. RJOY YAO No active NOTAMs for this location. No information, so it looks like there are no issues with the flight conditions at the airports.
Next, let’s look at the upper wind conditions. Yahoo Weather provides wind information at 1000 meters above ground, which is perfect for reference.
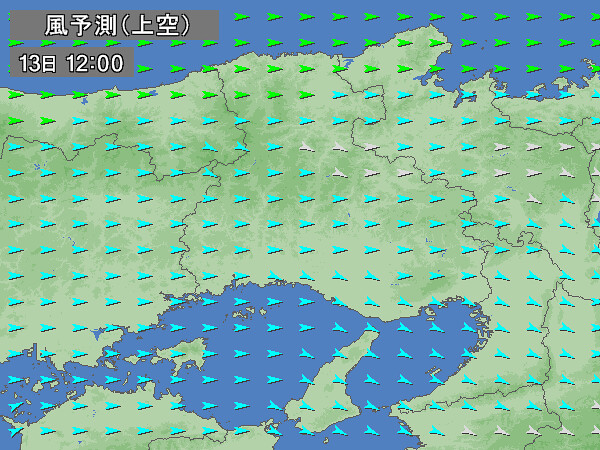 Here, the wind is basically under 5 knots, with a direction of around 120 degrees, so it will have no major impact on the flight.
Next, look at the upper-level weather charts. I am using the weather charts issued by the Japan Meteorological Agency twice a day.
For example, looking at the Asia 850hPa/700hPa Height, Temperature, Wind, and Dewpoint Dep. Chart (AUPQ78),
the airspace for this flight is under the control of a warm high-pressure system. The weather is stable, with no adverse conditions like rain or strong winds, so we can fly with peace of mind.
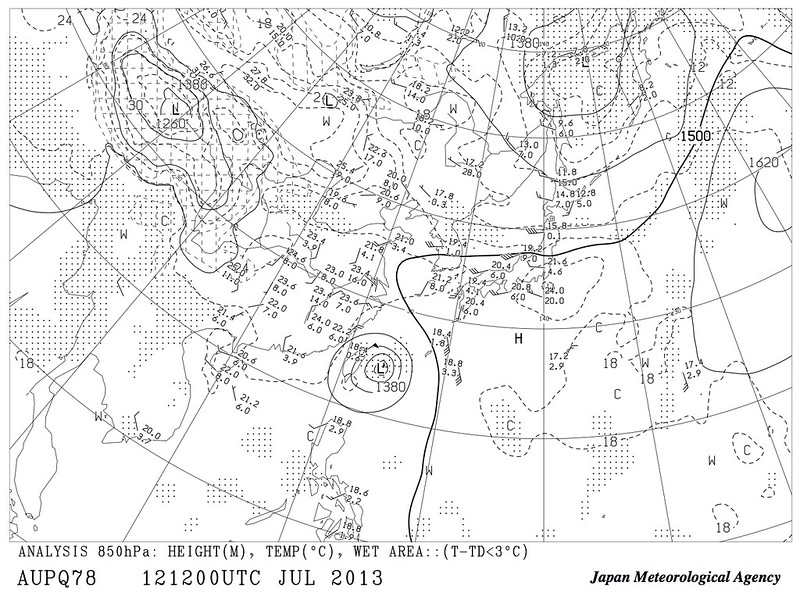 Additionally, you can see a huge low-pressure system over Taiwan. This is the first super typhoon of the year, Typhoon Soulik (SOULIK), but fortunately, it is far away and will have no effect.
The research is complete. Now, let’s draw the flight route chart.
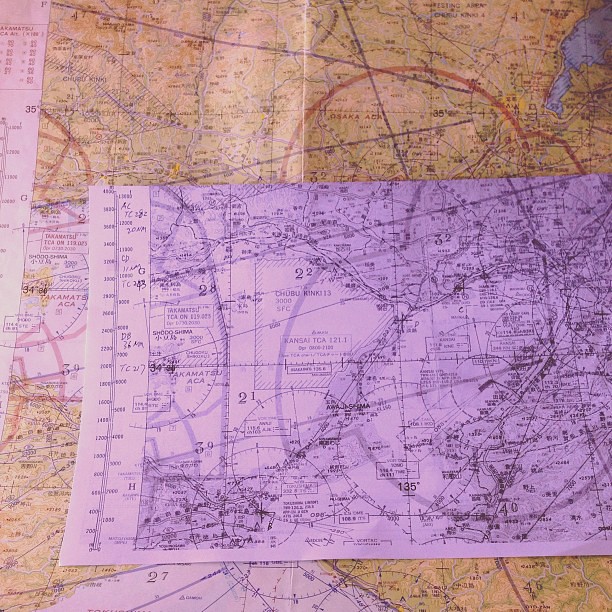
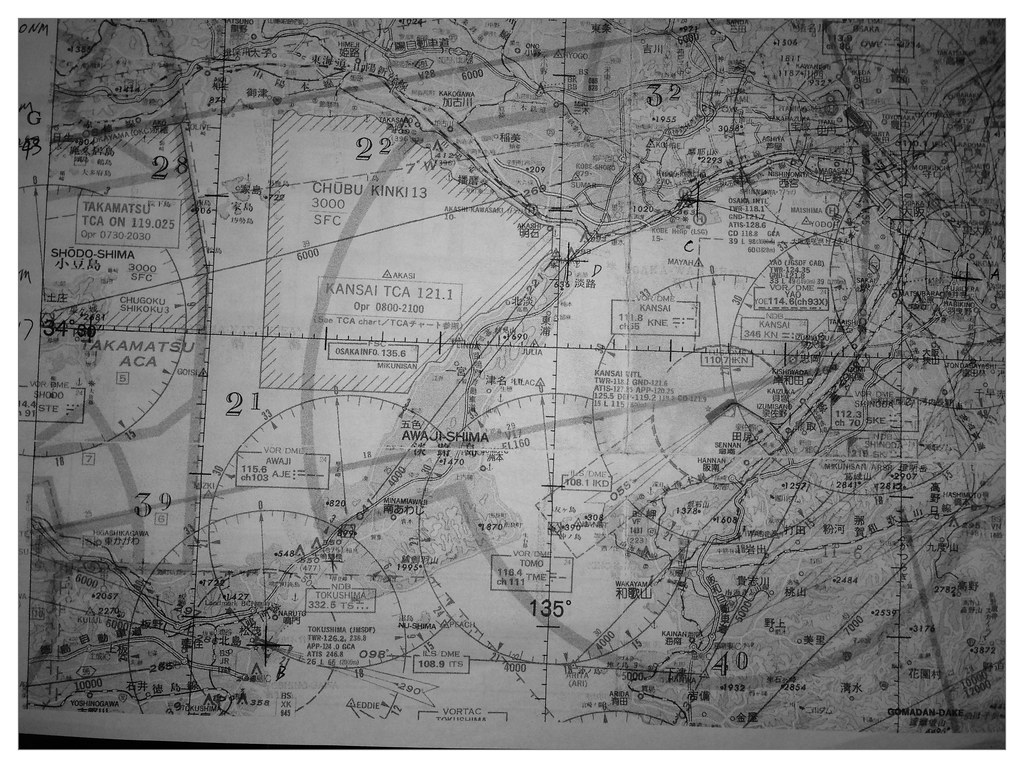
I happen to have a sectional chart for this area (scale 1:500,000 Lambert Conformal Conic Projection, also known as Equidistant Conic, chart number JAPA-504, published by the Japan Aircraft Pilots Association). I took it out and photocopied the flight route section. Since the journey isn’t long,
it fits perfectly on a single sheet of A4 paper.
First, mark several Waypoints on the chart. Since this is VFR, the turning points are chosen as distinct and easily identifiable ground features:
- Osaka Yao Airport — The departure airport. According to the airport information above or on the chart, the coordinates for Yao VOR are 34 degrees 35 minutes 54 seconds North, 135 degrees 35 minutes 37 seconds East.
- Kobe City Center (above China Town?) — Turning point
- South side of Akashi Bridge — Turning point
- Naruto Bridge — Turning point
- Tokushima Airport — The landing airport. The coordinates for Tokushima VOR are 34 degrees 7 minutes 47 seconds North, 134 degrees 36 minutes 31 seconds East.
Draw a 1cm cross at each point and connect them with straight lines.
Because each leg is quite short, I haven’t set up checkpoints for each leg.
Next, take out the plotter to measure the TC (True Course) for each leg,
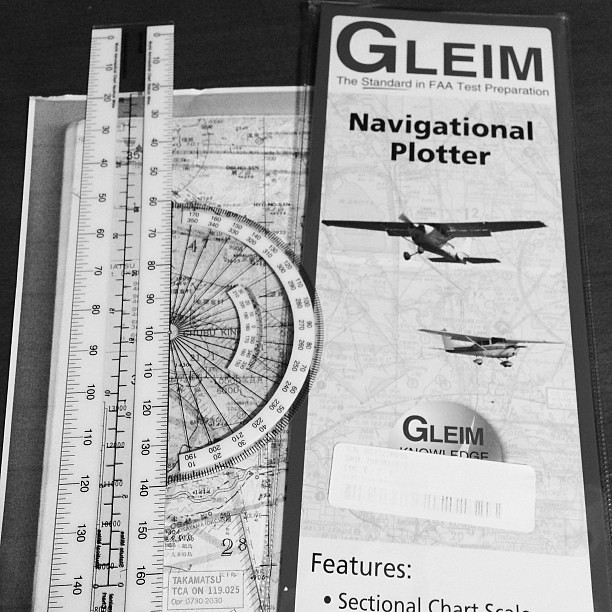 I won’t explain the specific usage in too much detail; looking at the product instructions makes it quite easy to understand. Simply put:
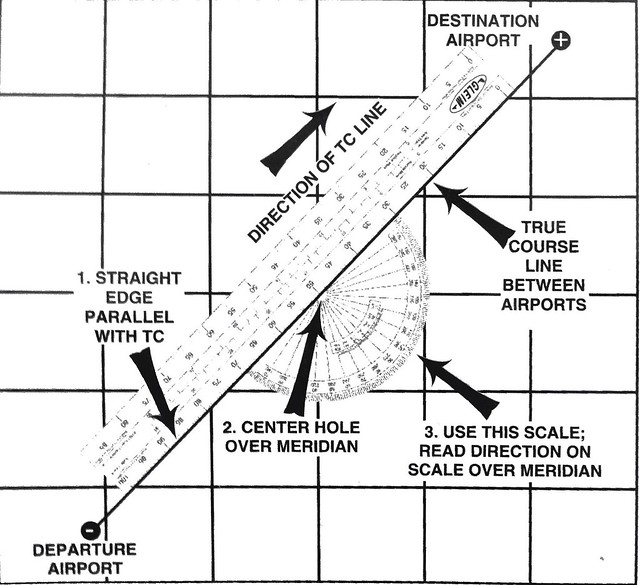
- Align the black line of the ruler section with a specific leg.
- Move the center point of the circular ruler to a nearby meridian (vertical line).
- The angle on the circular scale corresponding to the meridian is the TC angle.
TC measurement results are as follows: Yao – Kobe 285 degrees Kobe – Akashi Bridge 243 degrees Akashi Bridge – Naruto Bridge 217 degrees Naruto Bridge – Tokushima Airport 217 degrees
Alright, fill in the flight plan table with the True Airspeed (TAS) for each leg (I chose 80 knots for the Climb phase, 100 knots for cruise, and 90 knots for Descent), TC, wind speed/direction, and flight altitude (I chose 4500 feet for this trip. Because when the magnetic course is between 0 and 179 degrees, flight altitude must be set to odd thousands plus 500 feet; when between 180 and 359 degrees, it must be set to even thousands plus 500 feet.),
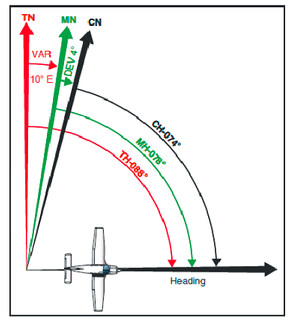
Then calculate the Wind Correction Angle (WCA) for each leg to get the True Heading (TH), then calculate the Magnetic Heading (MH) based on the local isogonic line of West 7 degrees, and finally add the compass deviation correction (temporarily set to 0 here) to get the required Compass Heading (CH).

For methods on calculating the Wind Correction Angle (WCA) and Ground Speed (GS), you can refer to the Chinese E6B instructions. If you don’t have a flight computer or navigation calculator, you can refer to the following articles on this site: DIY Navigation Computer E6B A Better Free Navigation Computer E6B DIY Model iOS E6B Calculator App – iE6-B
The ZDIST item is the leg distance, measured directly on the chart using the plotter. Based on the Ground Speed (GS), you can calculate the flight time for each leg. According to the calculation results above, the total flight distance for this trip is about 70 nautical miles. The Climb phase is estimated to take 10 minutes; reaching Kobe airspace is estimated at 15 minutes; arriving at Akashi Bridge takes 22 minutes; Arriving at Naruto Bridge takes 38 minutes; and the total time to Descent to Tokushima Airport is estimated at 44 minutes. Note that the estimated Climb rate is 500 feet/min, so climbing to 4500 feet should take 9 minutes, but considering the high temperature, I used 10 minutes as the forecast value.
Finally, fuel. This flight uses a PA28 181 ARCHER II. Adding the flight time calculated above to ground taxiing and approach flying, the estimated total time is 1 hour. Generally, 100 gallons is enough. Considering the need to divert due to changing weather conditions, and factors like circling over scenic spots, I filled up with 200 gallons of fuel.
Additionally, since the aircraft uses VOR as an auxiliary navigation device, I noted the frequency and radial of the VOR radio navigation station used for each leg in the remarks section for easy operation during flight. For example, for the Yao Airport – Kobe leg, use the Yao YAO VOR. The station frequency is 114.6 (the data in the chart is incorrect), and the radial is 292 degrees.
Finished
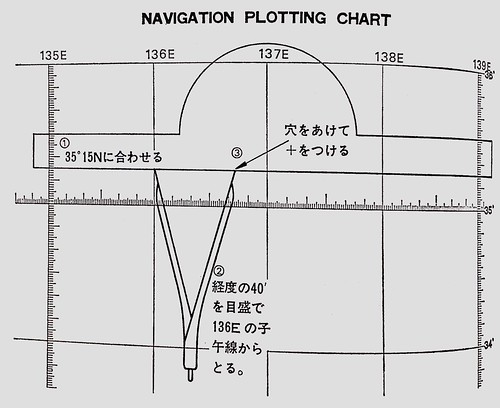
Appendix 1: How to mark positions on the chart based on latitude/longitude
- Align the ruler with the latitude line.
- Use a compass to measure the required longitude offset, and place the starting point on the longitude line.
- Make a prick mark at the end of the compass, and draw a cross mark in the chart.
Appendix 2: Relationship between TH/MH/CH