Summary of Peripherals I Use in X-Plane 10 (Yoke, Throttle, Pedal, Trim, TrackIR, Radio Panel)
I use a 27-inch iMac myself. It started with 4GB of RAM, which I later upgraded to 12GB, and 1GB of video memory. It’s a completely standard configuration. This hardware is basically sufficient, but since the iMac’s built-in graphics card isn’t great, I can only say it’s “adequate.” With the 3D cockpit enabled, the display speed generally hovers around 20-40 fps.
Regarding peripherals, because I place a lot of importance on the realism of flight, I bought the following specialized Saitek peripherals.
First is the YOKE Flight Yoke (Saitek Pro Flight Yoke), primarily used to control pitch and roll operations.
This yoke has many buttons—over a dozen—mainly configured for view toggling and view direction switching, ATC communication, aileron/rudder trimming, and other functions.
Saitek Pro Flight Yoke with Three-Lever Throttle (PZ44)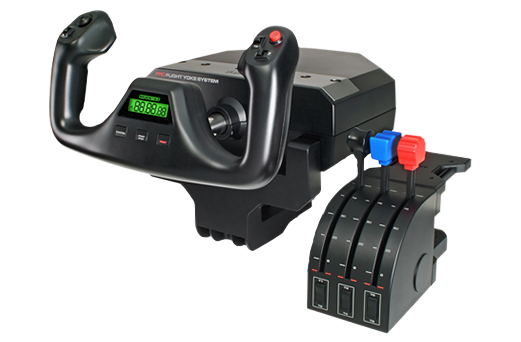
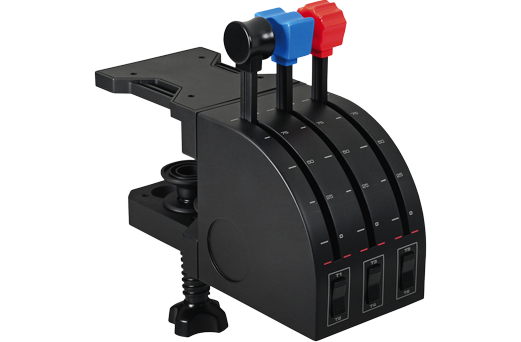
Next is the Throttle Quadrant (Saitek Three Lever Pro Throttle Quadrant),
Mainly used to control Thrust and fuel mixture. The 6 buttons are used to control Flaps, engine start, map display, etc.
Flight Rudder Pedals (Saitek Pro Flight Rudder Pedal) are absolutely indispensable peripherals; their function, of course, is to control the rudder and ground left/right braking. I strongly recommend every player equip themselves with a set of rudder pedals; otherwise, you will absolutely be unable to experience the feeling of real driving in X-Plane. You can refer to this blog post for the rudder pedal setup method.
Saitek Pro Flight Rudder Pedals
There is also a dedicated Trim Wheel (Saitek Pro Flight Cessna Trim Wheel). This is a collaboration product between Saitek and Cessna, and its appearance is identical to the genuine Cessna design. With this trim wheel, you can perform finer adjustments, and the feeling of piloting is really much more comfortable. It’s very impressive.
Saitek CES432110002/06/1 Pro Flight Cessna Trim Wheel
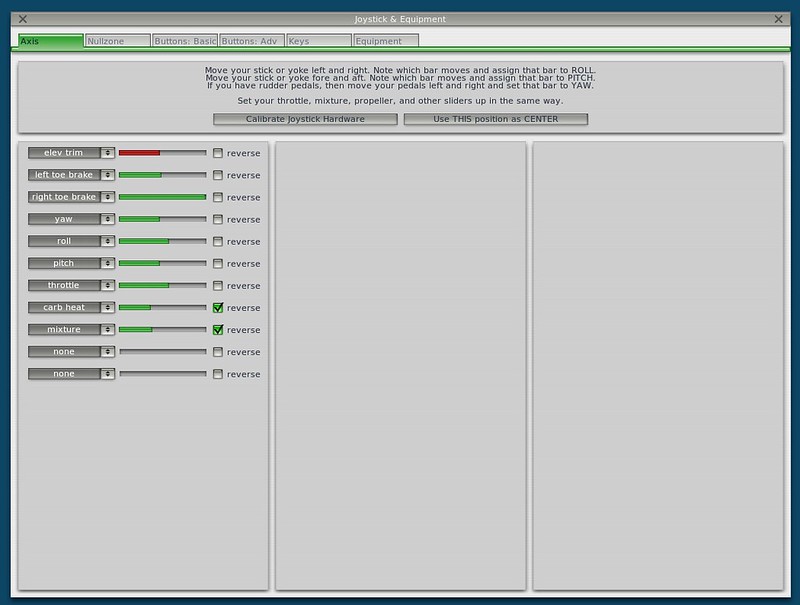
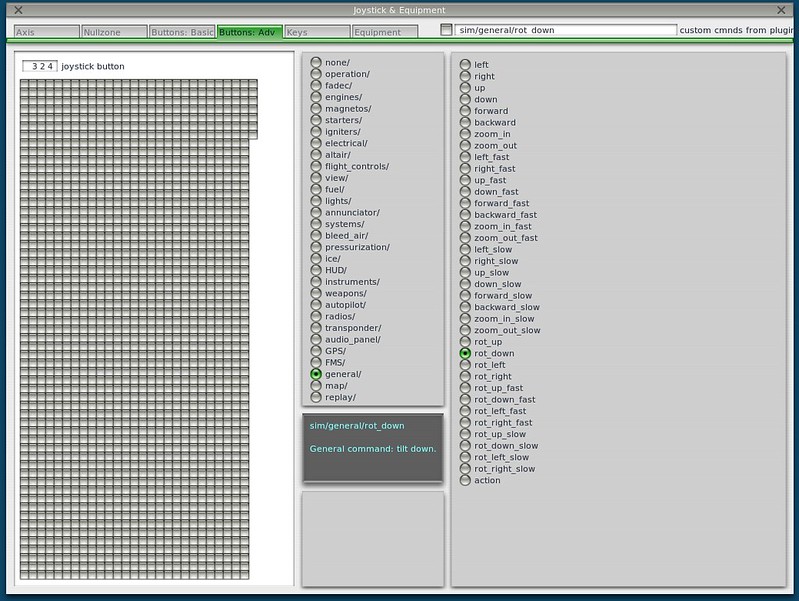
None of the above peripherals require installing any drivers on the Mac because X-Plane 10 supports plug-and-play. Simply plug these devices into the USB ports, open the settings panel, and the system will automatically find these devices. From there, all you need to do is assign the functions for each button.
Later, I added the NaturalPoint TrackIR 5 & TrackClip Pro head tracking system. With this, there is no need to constantly use the keyboard or buttons to switch viewpoints; the viewing angle on the screen moves smoothly and automatically as you turn your head. This is especially useful during landing. I summarized the setup method here.
TrackIr 5 Premium Head Tracking for Gaming
When playing with ATC communication and radio navigation, I found using a mouse to switch frequencies really troublesome, so I bought a Radio Panel (Saitek PRO Flight Radio Panel). The setup method is summarized here.
Saitek PRO Flight Radio Panel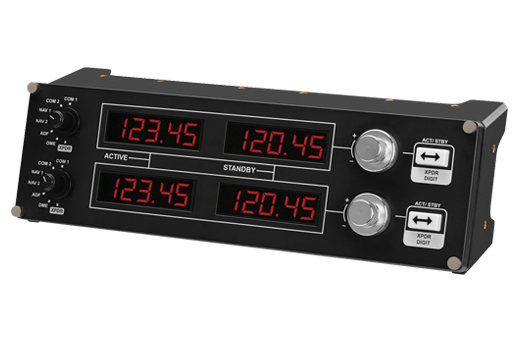
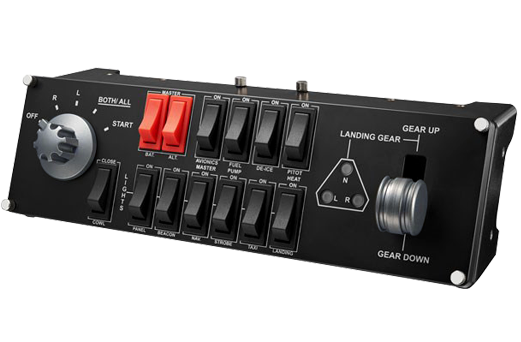
Later, I also bought a SWITCH PANEL, so operations for Flaps, engines, lights, etc., can all be controlled on this unit.
Finally, the specific settings for every button and every joystick are summarized in My Hardware Device Setup Notes. Please refer to them.
End